Template configuration
Every aqua project implements a template which defines the configuration of the project. By editing the template, you can customize the layout and the dialog fields for the following items: defects, requirements, test cases, test scenarios and scripts. There are two types of fields - predefined fields and custom fields. Predefined fields are configured by default and can only be partially customized by the aqua users. Custom fields can be added when additional fields are required for an individual configuration.
General configuration of Fields
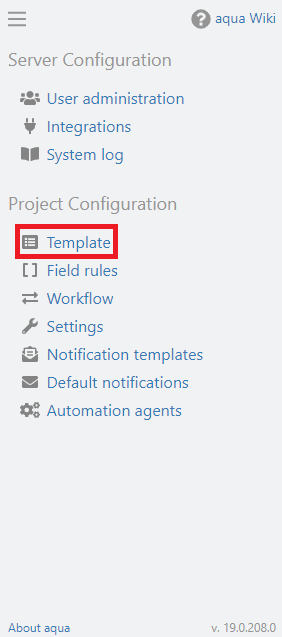
Select your project in the project browser and click on the configuration menu in the upper left corner of the aqua header  . In the Project Configuration area, select the Template entry.
A list with all item fields appears. In the bar on the bottom you can choose, for which item type you want to edit the fields.
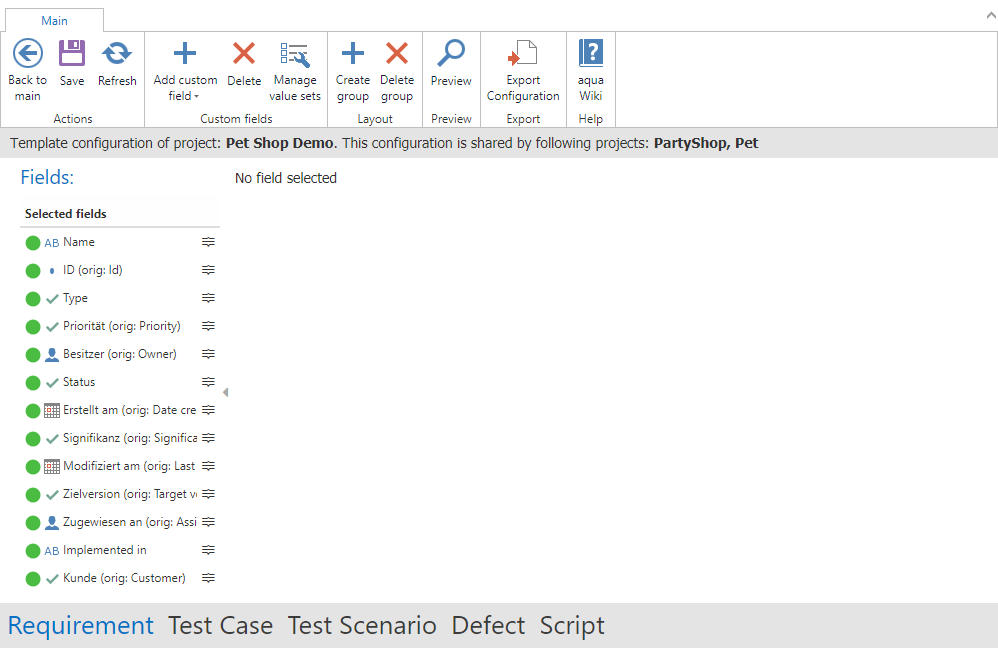
When you select a field from the list, you can change different properties depending on the field type, such as field name or field values. Clicking the dot to the left of the field name adds (green dot) or removes (red dot) a field from the selected fields. Only the selected fields are visible in the layout.
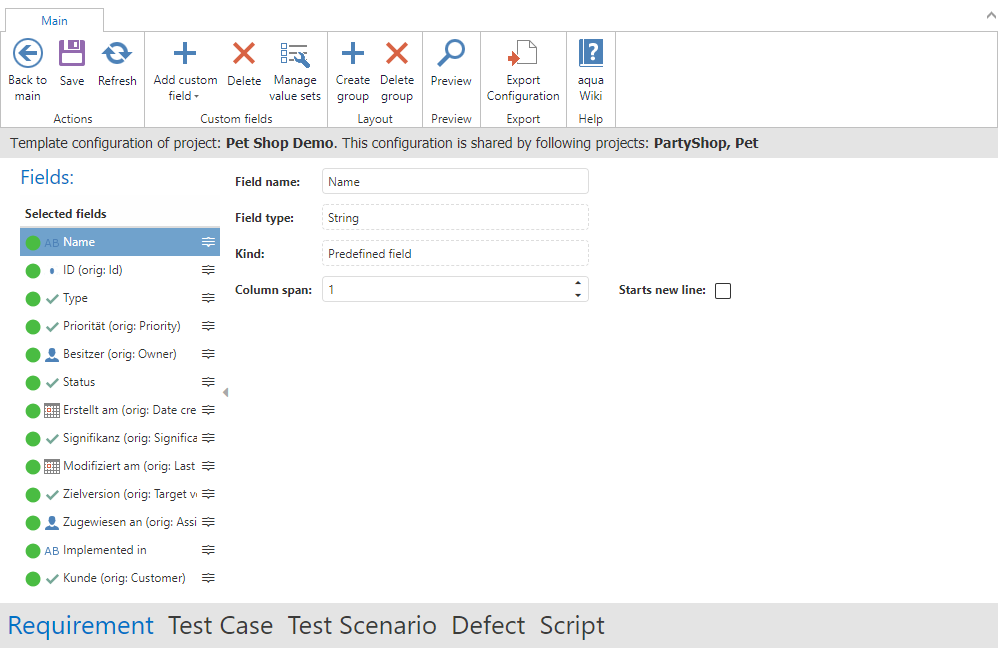
By pressing the  button, you can move fields in the list. This will also move the fields in the items. With Column Span you can define how much space a field takes up in the layout and with Start new line you can define that this field is at the first position in the layout in the respective row. If you would like to get a preview of the changes, press
  .
.
Configuration of predefined fields
Predefined fields are automatically available in every project configuration and cannot be deleted. However, they can be removed from the view or added to the view as described above. In addition, the name can be changed for all predefined fields. The original name is still shown in the field list in brackets. The type of the predefined fields cannot be changed, but they can be partially customized; in particular, the field values for bulleted fields can always be changed, added or deleted (e.g. in the Status field). In addition, some predefined fields have special features, which are summarized in the following table:
|
Field name
|
Type
|
Special Feature
|
|
Name
|
Text
|
Always displayed in the first line of the layout.
|
|
Id
|
Id field
|
Is automatically generated when the item is created, is unique across all projects on a server and cannot be edited.
|
|
Status
|
Enumeration
|
This field is linked to the workflow. The possible status values can be configured in the template configuration. The permitted status transitions and restrictions can then be defined in the workflow configuration.
|
|
Owner
|
User
|
Is automatically filled with the current user during item creation and cannot be edited.
|
|
Last Editor
|
User
|
Is automatically filled with the current user when there is a change to the element and cannot be edited.
|
|
Assigned to
|
User
|
This field is linked to the following notification settings:
- Assign an item to me
- Changes in items that are assigned to me
|
|
Date created
|
Date/ Time
|
Is automatically filled with the current date and time at item creation and cannot be edited.
|
|
Last modified
|
Date/ Time
|
Is automatically filled with the current date and time when the item is changed and cannot be edited.
|
|
Implemented in
|
Text (Auto complete)
|
This is a text field, which also remembers all previously entered values and provides them as a selection list. Only used for requirements and defects.
|
|
Found Version
|
Text (Auto complete)
|
This is a text field, which also remembers all previously entered values and provides them as a selection list. Only used for defects.
|
|
Valid for
|
Text (Auto complete)
|
This is a text field, which also remembers all previously entered values and provides them as a selection list. Only used for test cases and test scenarios.
|
|
Progress
|
Decimal Number
|
In this field, the progress of an element can be tracked between 0% and 100% using a slider.
|
|
Sprint
|
Sprint
|
This field shows sprints that were created in the agile module in the desktop client.
|
|
Points
|
Decimal Number
|
In this field, points can be assigned to estimate the effort in agile projects. These are then also used in the agile module in the desktop client for the progress display in the burn-down diagram.
|
Configuration of custom fields
To add a new custom field, click on Add custom field in the ribbon bar. You can then select the field type and choose between the following types:
|
Type
|
Maximum number of fields of this type
|
Description
|
Example
|
|
String:
|
20
|
Used for short text values.
|
Name, note, link to website
|
|
Decimal:
|
20
|
Used for number values.
|
Points, euros, business values
|
|
Date:
|
20
|
Used for calendar dates and time.
|
Date the defect was fixed, date until the test case should be executed
|
|
Dictionary (single selection):
|
25
|
Allows choosing one value from a list with predefined values.
|
Version, priority, significance
|
|
Dictionary (multi selection):
|
10
|
Allows choosing multiple values from a list with predefined values.
|
Affected system, requested customer
|
|
User (single selection):
|
20
|
Allows choosing one user from a list with the existing users of the project.
|
Mainly responsible user, project manager
|
|
User (multi selection):
|
5
|
Allows choosing multiple users from a list with the existing users of the project.
|
Team members
|
If you choose one of these types, a field is created and you can choose the settings for this field. Then you can add the field to the selected fields by clicking on the red dot. You can then move fields in the list as described above. User-defined fields can also be removed by deleting them.
Modifying fields in a live project
If you make changes to the project configuration in a running project, this can affect the existing items. If the layout is modified and fields are moved, the new layout is applied to both new and existing items. Therefore, if you remove fields from the view (click on the green dot), the field will not be displayed in any existing items. However, the information stored in this field (e.g. the selection value of a selection field) remains in the database and is displayed accordingly when the field is added to the view again. However, if you delete a field, this field is also deleted from all existing items, including the data stored in this field.
If you change the order of the selection values in selection fields or add new selection values, this will be displayed in both new and existing items. No existing entries will get lost or modified by these changes. If you rename values from a selection field, however, this renaming will be implemented directly in all existing items, i.e. if you change the priority from "high" to "1 - High" in a live project, "1 - High" will now be displayed directly in all items for which "high" was selected.
If you delete a value from a selection field in the project configuration, this value is no longer displayed as a selection in new items, but is not deleted from existing items. The deleted value is therefore still displayed in existing items where it was selected. When you then open the selection field, this value is highlighted in red to show that it no longer exists and you can simply select one of the existing selection values and track this change in the history.
Before deleting fields or selection values for items where these selection values are used, it is recommended to set the desired new selection values via a batch update or if necessary fill out new fields that are to replace the old fields. One quick way to do this, is to filter for the desired items (see Views) and select them with Ctrl+a and perform the desired batch update (see Item Grid).