The installation is pretty simple. You only have to install aquaOfflineClient.msi and a new client is installed.
After the installation, you can execute the new agent. It works out of the box. You will receive a new login screen.
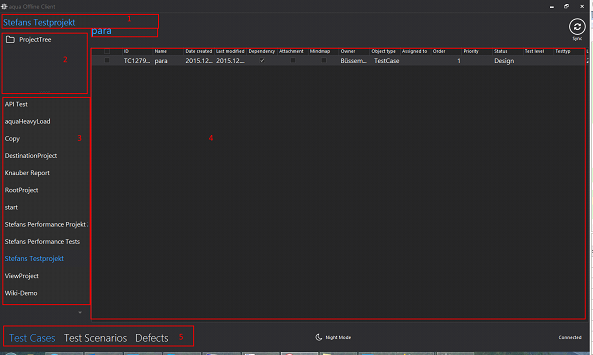
After the login, you receive the following screen:
1. Your actual project
2. Your project tree (folders) of your actual project
3. Your visible projects
4. Your entries in the grid
5. Different modules of aqua
In order to sync your test cases, you have to choose a project in part 3 and click on ProjectTree. Here,you can mark the directories that should be synchronized. In the next screenshot, you see that the main project, Test and nested is ready for synchronization.
Then press the Sync button and the test cases, test scenarios, and defects are synchronized.
As you can see, the elements in the grid are bold. That means that the elements are synchronized with the offline client and are ready to be executed.


 button and the test cases, test scenarios, and defects are synchronized.