Configure Server and Project-
Execute the following database query -
SQL Server: INSERT INTO SYNCMODULETYPE (Name, TypeDescriptor, IsProjectSpecific, LegacyMode) VALUES ('Sap SolMan', 'aqua.SyncSapSolMan.SyncSapSolMan, aquaSyncSapSolMan', 1, 0);
-
Oracle: INSERT INTO SYNCMODULETYPE VALUES (SYNCMODETYPE_ID_SEQ.nextVal, 'SAP SolMan', 'aqua.SyncSapSolMan.SyncSapSolMan, aquaSyncSapSolMan', 1, 0);
-
Open the web.config file with notepad (using administrator rights) C:\Programm Files\andagon GmbH\aqua for IIS\Web\Webservice\Web.config -
Add the following lines to the web.config within the <configuration> tags <system.serviceModel><serviceHostingEnvironment aspNetCompatibilityEnabled="true" /></system.serviceModel> -
Create the aqua project which shall be synced with SAP Solution Manager.
-
Import the SAP Solution Manager sync project template -
Create a special aqua user for the SAP Solution Manager sync. This user must be project administrator for the aqua project which shall be synced, and must be able to login via API. This user must not be used for anything else. Document the username as it is needed afterwards. -
Start the sync configurator and login into aqua -
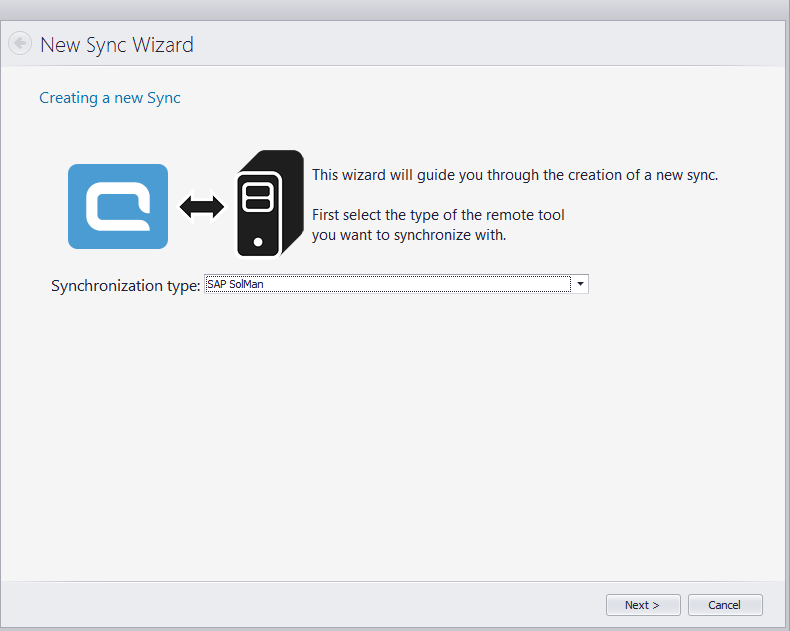
Create a new sync of type SAP SolMan
-
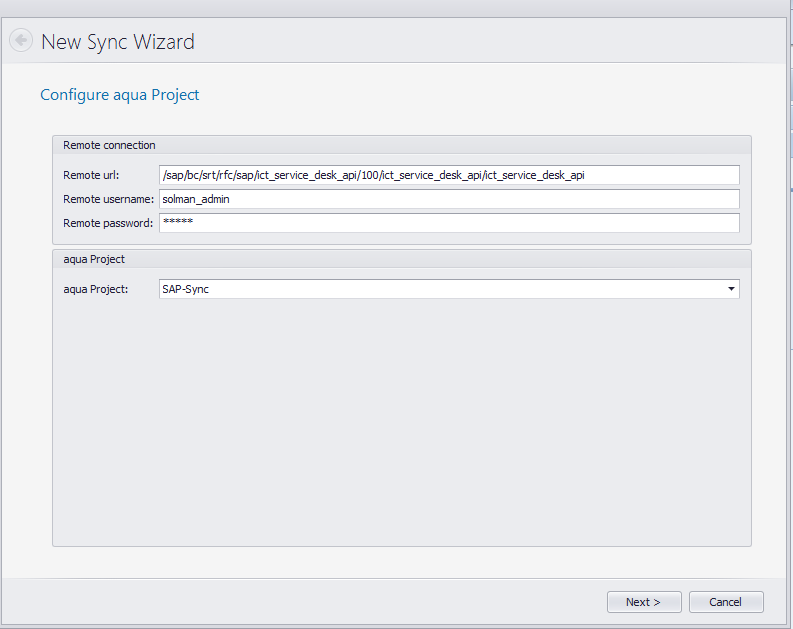
Enter the endpoint URL of the ICT_SERVICE_DESK API. This can be found in SOAMANAGER. You need to add the server name and port in front of the calculated access URL which is written in SOAMANAGER. Example URL: http://sap.andagon.com:8000/sap/bc/srt/rfc/sap/ict_service_desk_api/100/ict_service_desk_api/ict_service_desk_api
-
Enter the SAP Solution Manager credentials -
Select the aqua project created in step 4, then click ' Next'. The sync wizard will create a partial sync config.
-
-
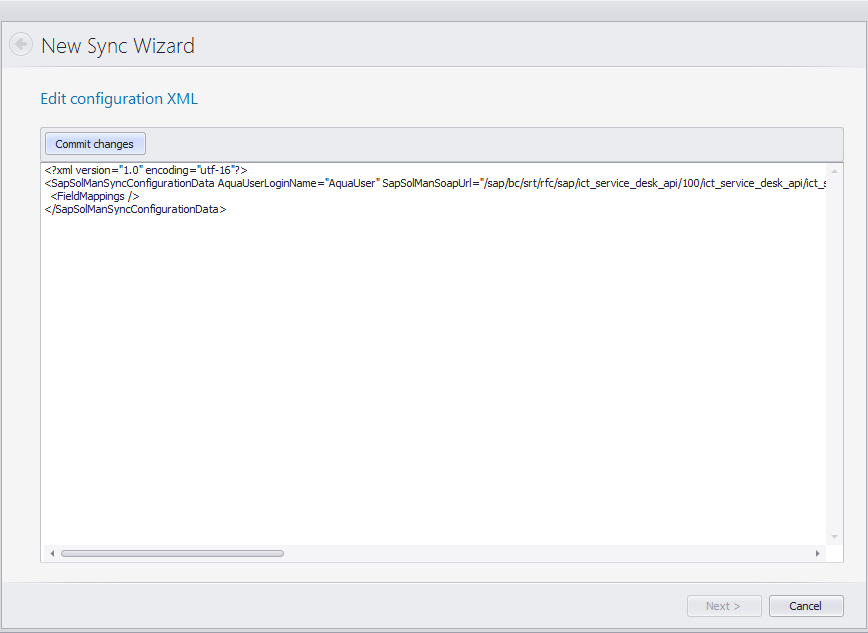
Set the aqua user used by the sync -
-
Document the following information shown in the XML: -
-
-
Click on ' Commit Changes', then click ' Next' Find a sample config here.
-
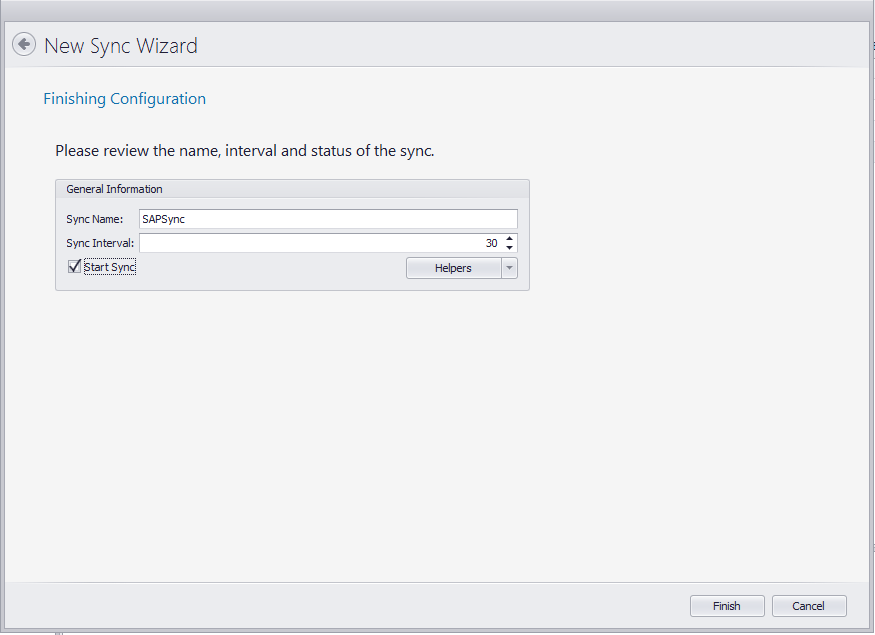
Enter a name for the sync -
Set a reasonable time interval for the sync, e.g. 10 seconds -
Check the ' start sync' checkbox -
Optionally, you can now use the ' Helpers' button to fetch the field values for dropdown fields from SAP and copy them to the aqua project template -
|