To allow users to access and work with a project you need to assign them to the project as project members. Launch the user administration by clicking File and choose User Administration from the menu. Please note that you need the appropriate rights.
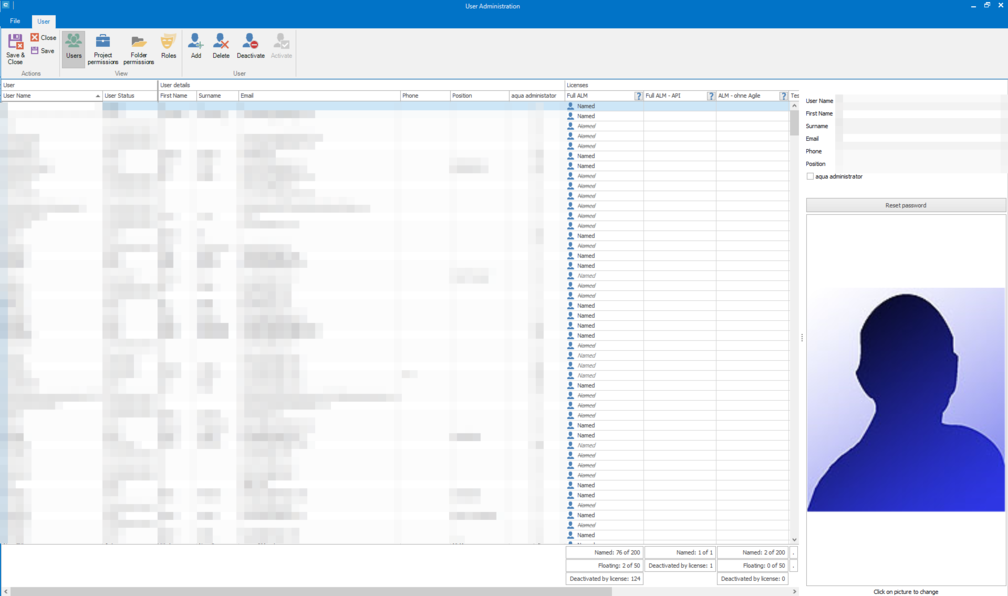
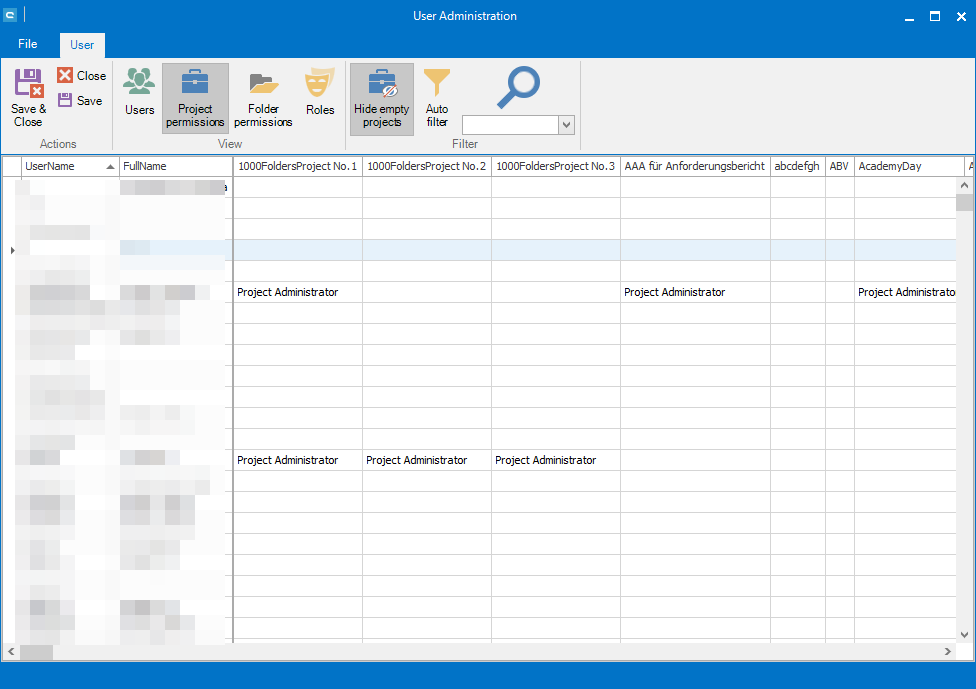
The screen User Administration opens. Here you can manage your projects and users with different roles and rights in a matrix. You can add new users with a wizard, assign licenses, manage new roles under Roles and see the permissions in sub folders. Furthermore you can get a good overview of which project every user is working on.
Adding and Managing Users and Licenses - View "Users"
View "Users" in user administration allows you to add users, assign an appropriate license according to your purchase, deactivate and delete users. Furthermore, you can reset a users password.
Adding Users
For adding a new user press button "Add" from the Ribbon Bar on top of the window. A user dialog will allow you to enter user details, assign the corresponding license and add the user to a project. In order to use the
Single Sign On / Connection to Active Directory you should create users with the same user name or the same email address of active directory.
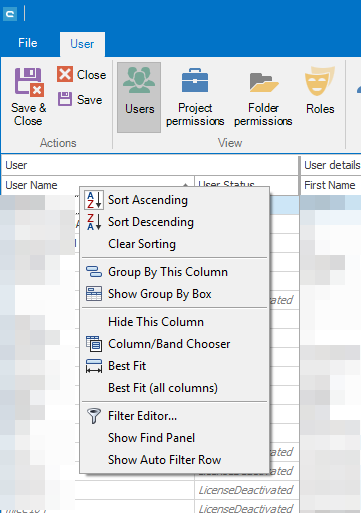
Finding a specific user
In order to find a specific user, you can right-click the column header (e.g. User Name) and select "Show Find Panel".
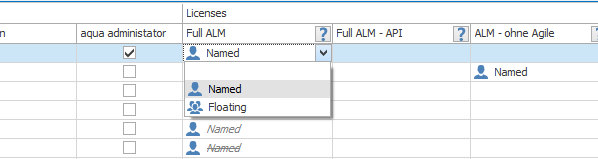
Assigning Licenses to Users
On the right hand side of the "Users" view, you can see all licenses that you have purchased, column-by-column. In order to assign a new license, you select the cell of the corresponding user and license directly in the data grid.
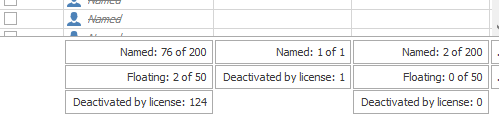
On the bottom of the screen you can see a summary of already assigned licenses and available licenses. Deactivated by license means that some time ago, there was no valid license available for some reason. The users are reactivated automatically on login if enough licenses are available.
Resetting a Users Password
In order to reset a users password, please select the appropriate user and click the button "Reset password" on the right-hand side. When you press on "Save" now, an email with a newly generated password is sent to the user. Important: Without pressing "Save" or "Save & Close", the password will not be reset and no email is sent to the user.
Assigning Users to Projects - View "Project permissions"
For assigning a user to a project, you select the corresponding cell and select a role that a user holds in this project. Roles can be defined in View "Roles".
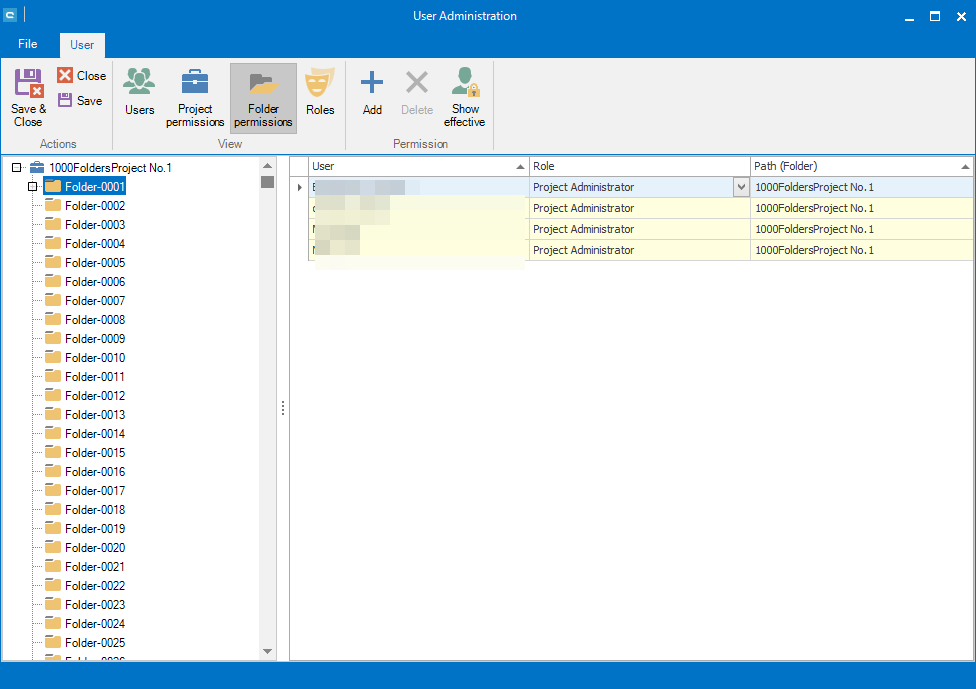
Setting individual folder permissions - View "Folder permissions"
Permissions can be configured per folder. As an example, one user might only be able to read defects in folder A, but in folder B he is able to edit and delete defects. View "Folder permissions" allows to configure these special permissions.
In order to add a folder permission, select the specific folder and press the blue plus button labeled 'Add'. Please note: Permissions are inherited, that is, permissions of a subfolder can only be extended with respect to its parent folder.
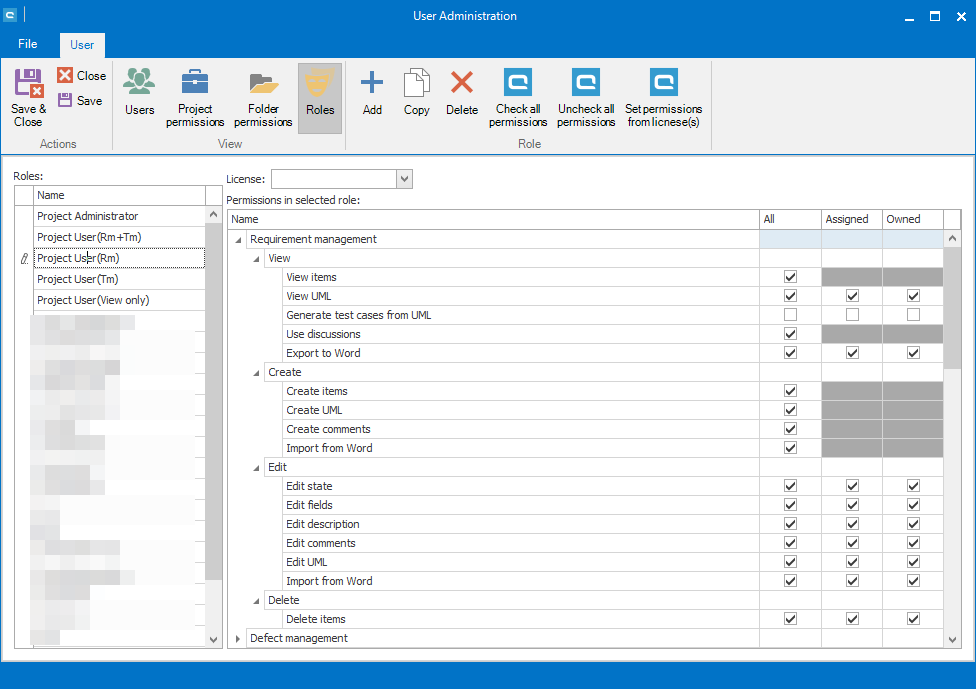
Defining a Role - View "Roles"
In the user administration you can define individual roles, which customize the rights of your user groups. Later on, the role can be assigned to a specific user in a specific project in View "Project permissions". Here you will find the predefined roles Project Administrator, Project User (Rm+Tm), Project User (Rm), Project User(Tm), Project User(View only) and Project Assignment. The roles Project Administrator and Project Assignment cannot be changed due to internal processes and the connection to external tools.
You can create, copy and delete roles with the following buttons.
The Select-Box named "License" allows to highlight permissions given by license. After that, "Set permissions from license(s)" allows to define a role based on a given license if needed. In this way you can analyze, if a set of permissions fits to a given license.