If a test is specified with test steps and/or test conditions, you are able to manually execute the test case. Open a test case and click on Run.
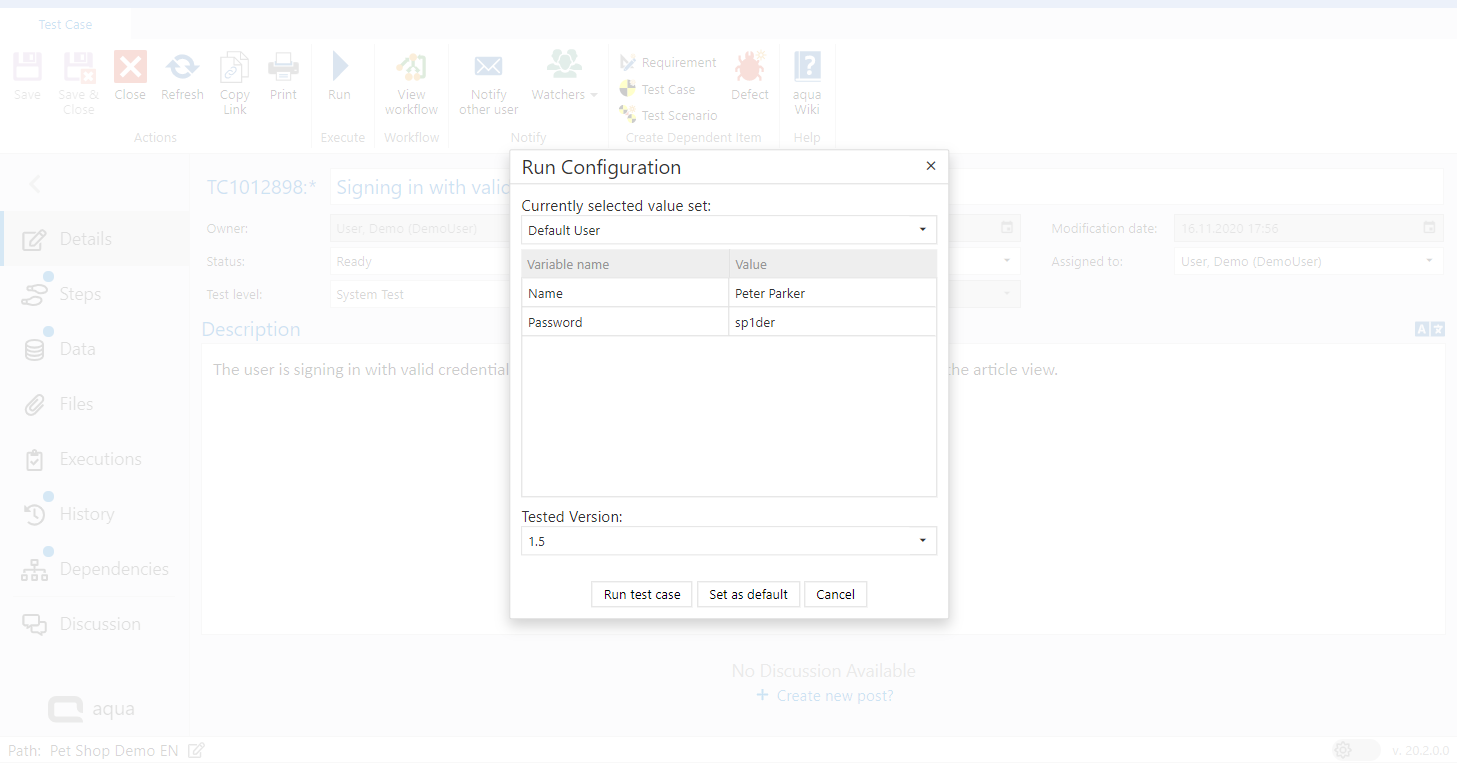
Clicking Run opens a configuration window where you can enter the tested version and choose the value set, if defined. The value set is described in section Variable Manager. Test execution labels can be used to track information about the System under Test and Test Environment. More details here. Start the execution by clicking Run.
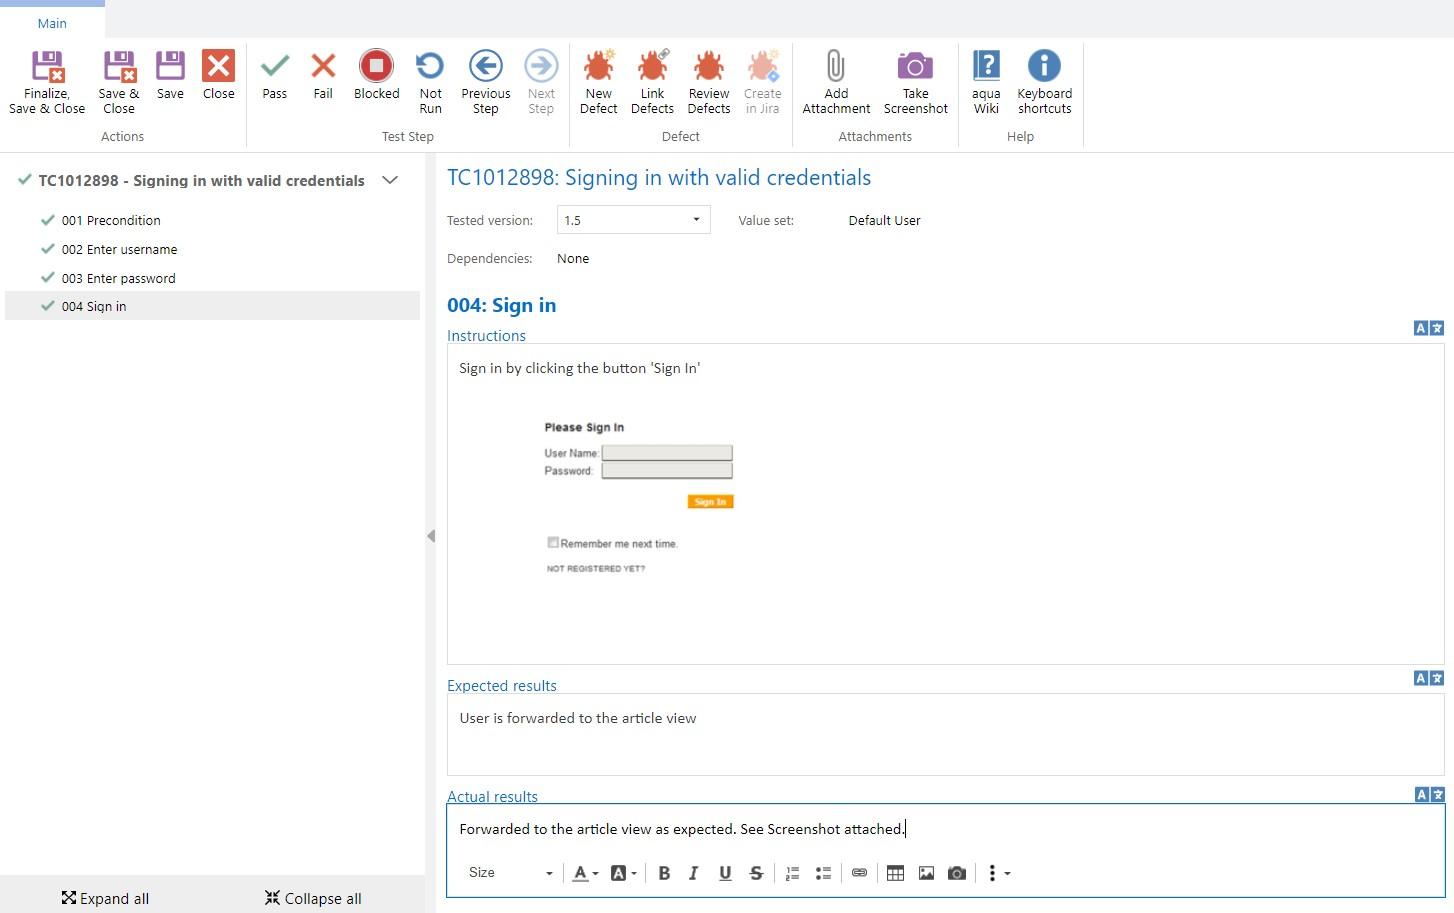
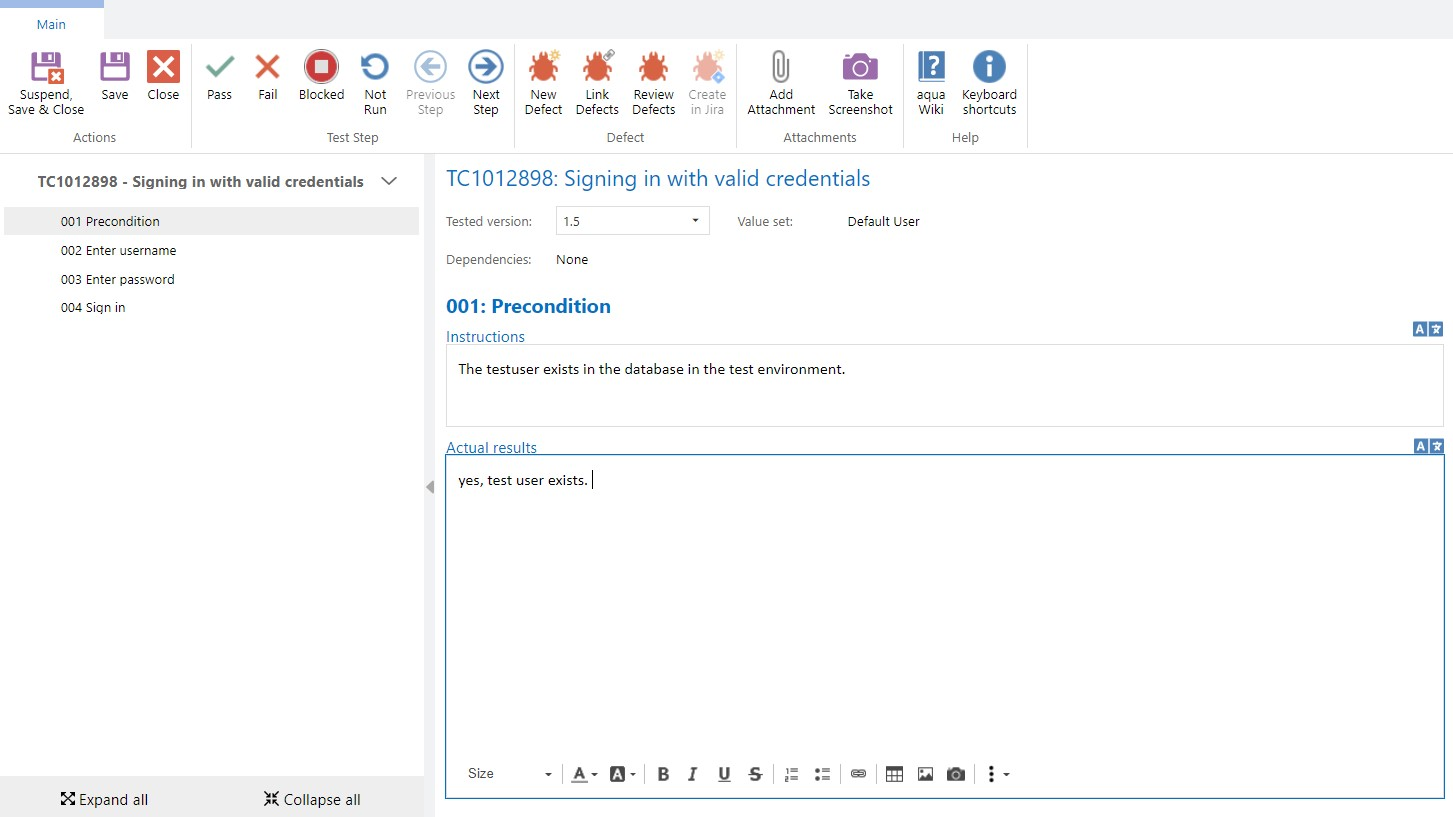
A new tab provides step-by-step the tasks to be performed in the given test case. The screenshot below shows a conditional step. Document the current behavior in Actual results. As in all description fields, the text can be formatted and tables or images can be added (via the toolbar in the lower part of the result field or by copy & paste).
If the first step is passed, we confirm the result by clicking button Pass. The first step is green and the next step is displayed automatically.
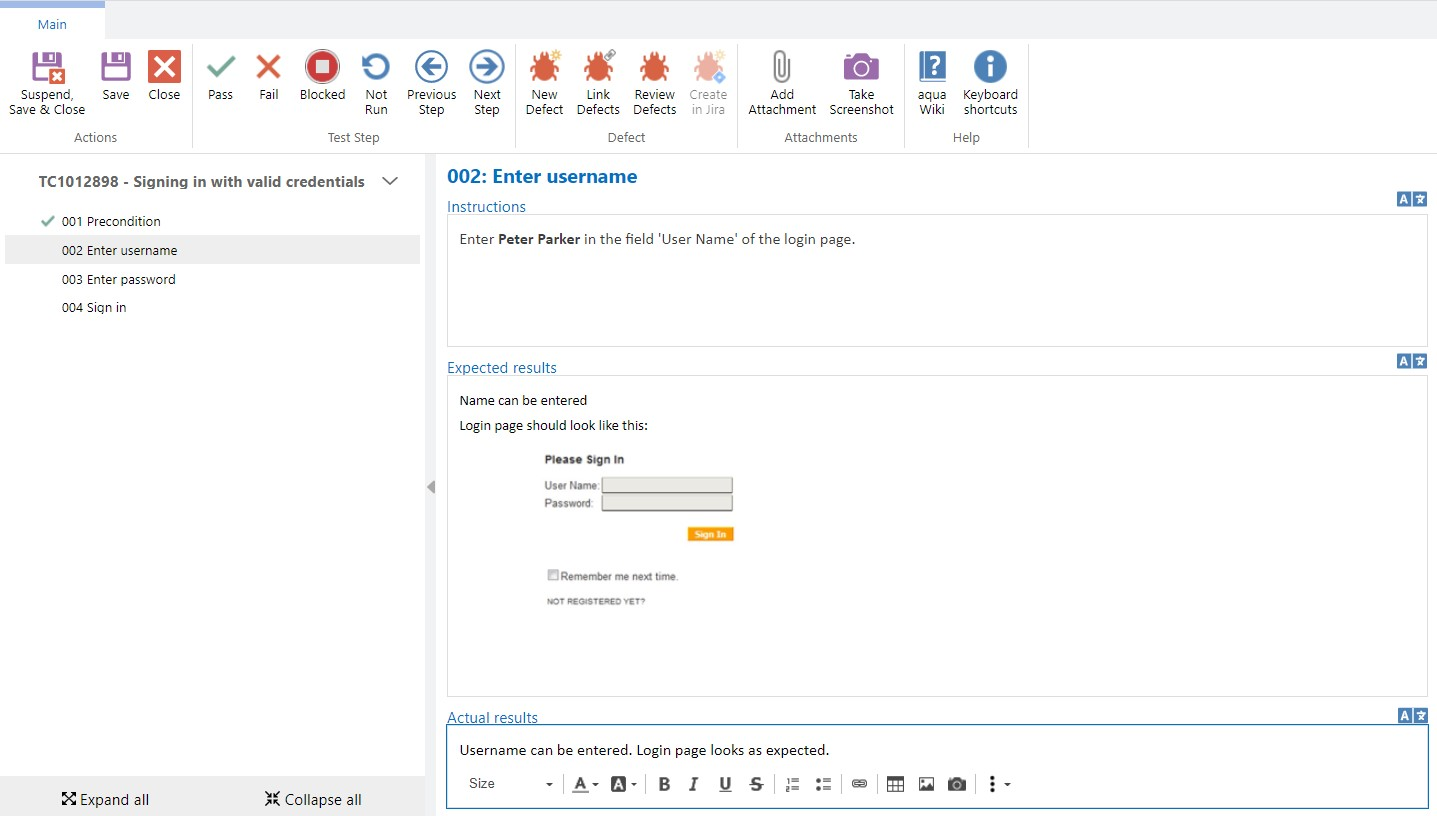
The second step is a test step. Here we find an Instruction and an Expected result as well as the Actual results field.
Again, you document your result in the Actual Results field and set the corresponding status. You can then run through all individual test steps and mark them as Pass, Fail, Blocked or Not Run. If you have configured in the Project Settings that the actual result is a mandatory field, you cannot set an execution status for the steps as long as this field is empty.
If you mark a test step as Pass, you will automatically proceed to the next step. Using the list of steps on the left side or the button in the ribbon you can additionally navigate to other steps.
Under Add Attachment you can attach one or more files to this execution. These can be Word files, Excel lists, screenshots or even zip-folders with a large number of screenshots.
With Take Screenshot you can capture your screen or application and edit the screenshot, add comments and insert it into the description field or as an attachment. For more information, see the Take Screenshot chapter.
With the Save button you can save your execution at any time. As long as you have not marked all steps as Pass or at least one step as Fail or Blocked, you can only Suspend, Save & Close, i.e. pause the execution. A paused execution can be resumed later in the Execution tab of the test case. Once an execution has been executed completely, you can Finalize, Save & Close it to save the result in a final and audit-proof way or only Save & Close if you want to edit the execution later. All executions including the execution details can then be viewed in the Executions tab where they can be continued, edited or finalized.
If you discover a defect during your execution, you can set the corresponding step as Fail and then create a new defect directly from the execution or link an existing defect to this execution.
If you successfully execute a test case that is linked to a defect, you can review the related defects from the execution and set it to closed, for example.

 you can capture your screen or application and edit the screenshot, add comments and insert it into the description field or as an attachment. For more information, see the