In this topic you will find an example step by step manual, how to configure a first basic sync between aqua an Jira.
Preparation
Create projects and users
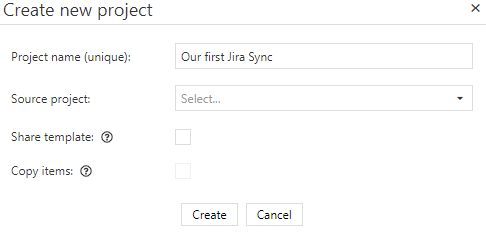
First, we create a project in aqua, called 'Our first Jira Sync'.
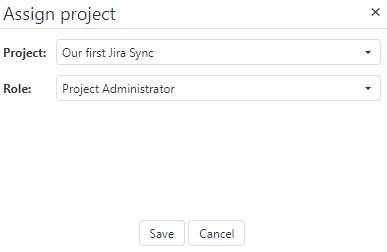
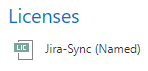
Now we switch to user administration and create a user 'Jira Sync'. Please use a special email address for your user, since all sync errors will be mailed to this address. We assign this user to the project with the role 'Project Administrator' and assign the license 'Jira-Sync (Named)'. We disable all aqua notifications for this user.
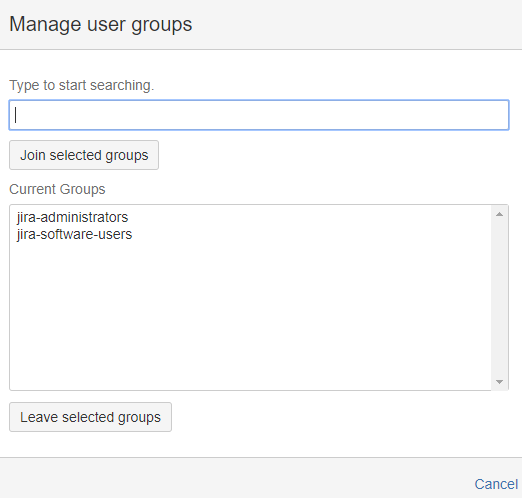
We now create a user for the sync in Jira. To do so, we switch to the User Management and click 'Create user'. Choose a username and enter all necessary data. Please make sure that you use the same email address for this user, as for the aqua user. When done, click on the three dots next to the user, to assign him to the group 'jira-administrators'.
Please make sure to disable automatic watching, notifications and captchas for your Jira user. To disable automatic watching, log in with the user and click on its picture. Select 'Profile'. Here you will find a setting for autowatch under preferences. Notifications are disabled on project level. Select project settings and go to notifications. Use a different scheme and select none. Captchas can be disabled in the general configuration. Click 'Edit Settings' and select 'OFF' for 'CAPTCHA on signup'.
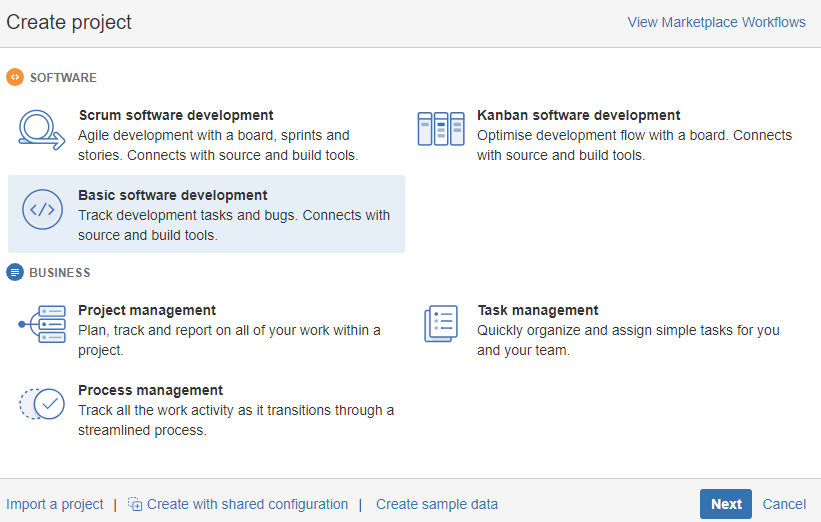
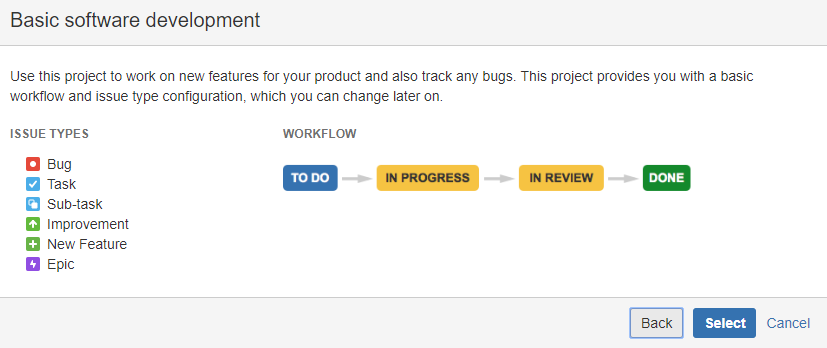
We create a project in Jira, whose items should be synched to the aqua project 'Our first Jira Sync'. We choose 'Basic software development'.
This uses the following workflow.
Afterwards, please check if the user is assigned to the new project.
Fields & Workflows
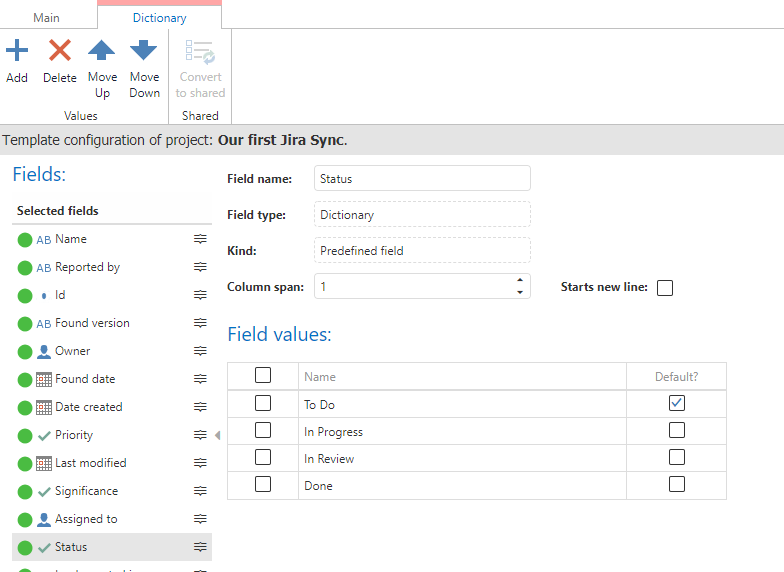
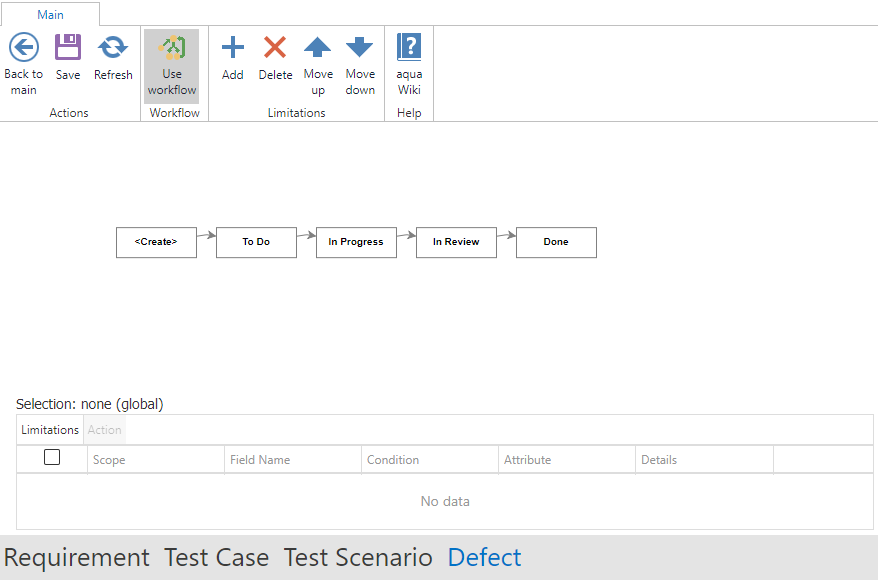
We will now create the workflow in aqua fitting to the Jira workflow. To do so, we go back to aqua and open the project configuration. Here, we delete unnecessary status values for defects so that we have fitting ones to Jira.
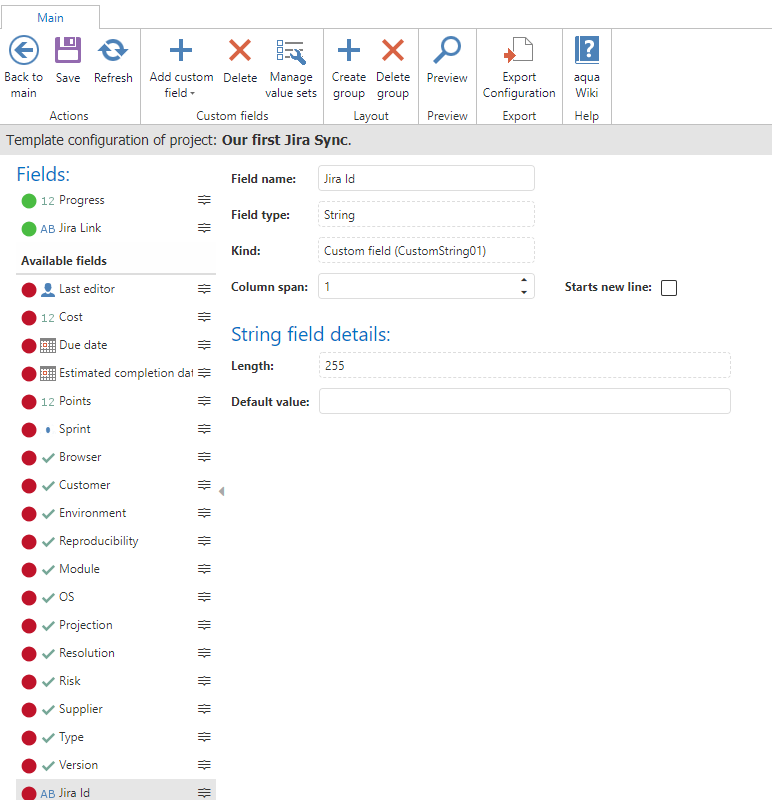
Besides that, we add the fields 'Jira Link' and 'Jira ID' as string fields. Press on the red dot to add them to your template. In this section we also add the field 'Resolution' with the same values as in Jira plus a value 'Unresolved'. We do not add this field to our template, since we will not set values for it manually and we do not need it to be visible in aqua.
We save the changes and go to workflow configuration. We switch to defects tab and click 'Use Workflow'. Now we draw the arrows between the status as in Jira.
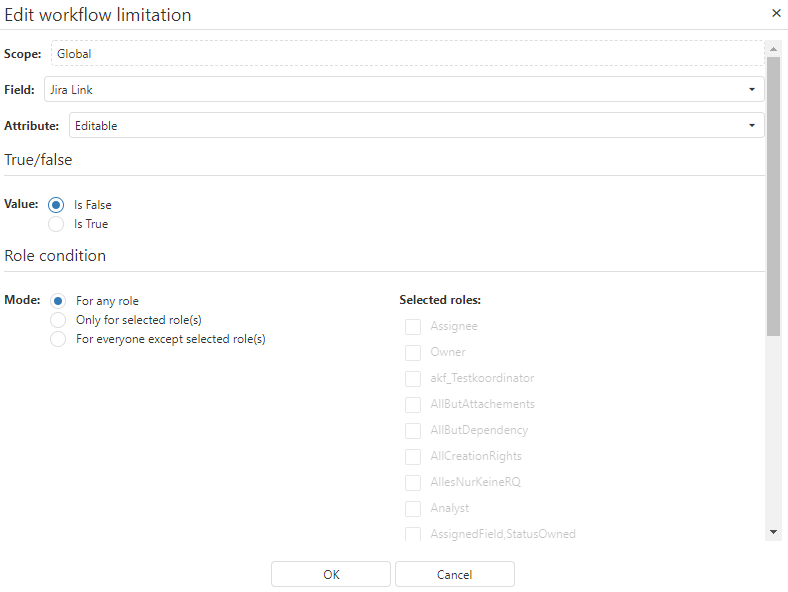
Using the 'Add' button we define the fields 'Jira Id' and 'Jira Link' as read-only.
Configuration
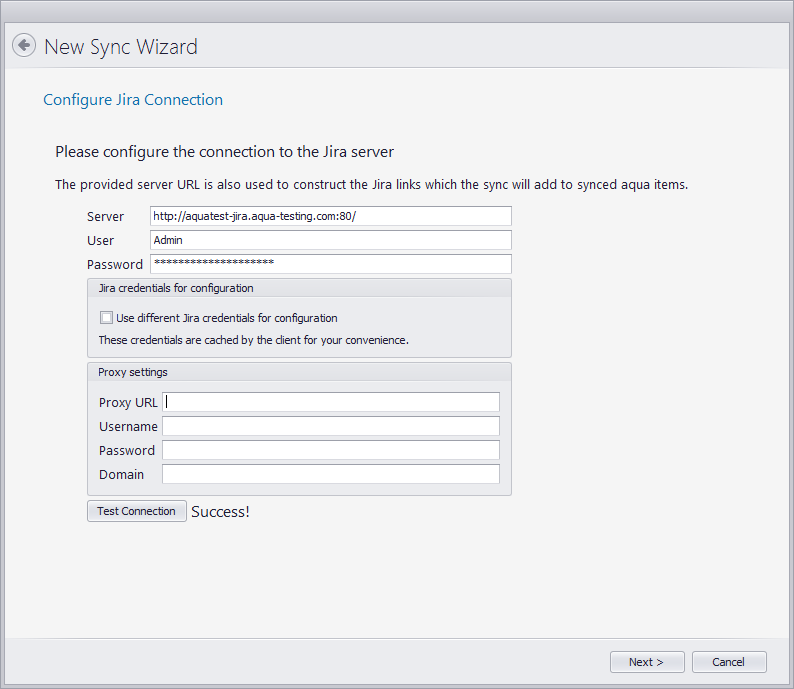
All necessary preparation steps are done, so we start configuring the sync. We log in to the aquaSyncConfigurator using our own user. Via 'New Sync' we start the configuration of our sync. In the first window, we select 'Jira Rest'. In the second window, we enter the necessary information of our Jira system.
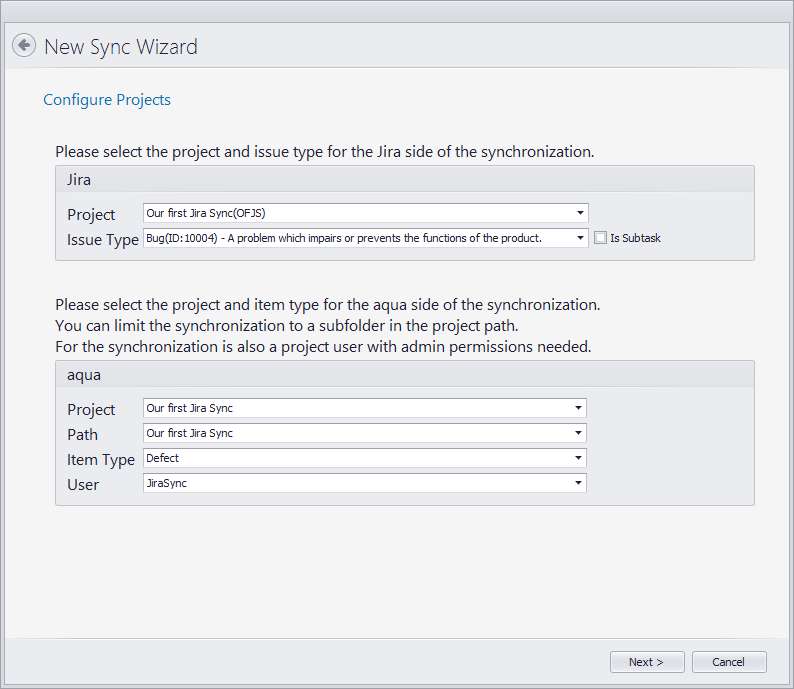
The sync now receives all the necessary information regarding our Jira configuration and the available aqua projects. We choose which project should be synced and which issue type.
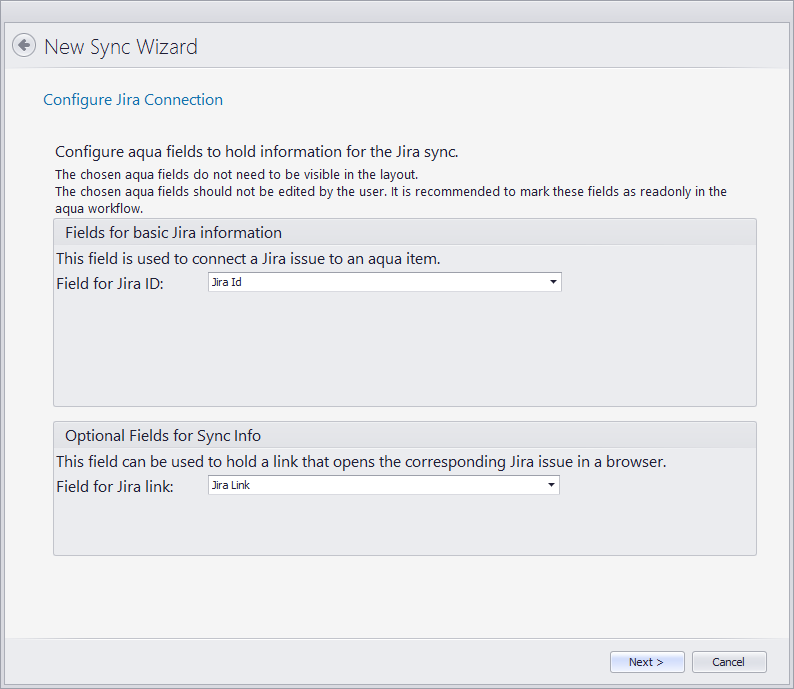
The sync will automatically detect the fields for Jira Id and Jira Link. We can now change them, but we want to leave it as it suggests it.
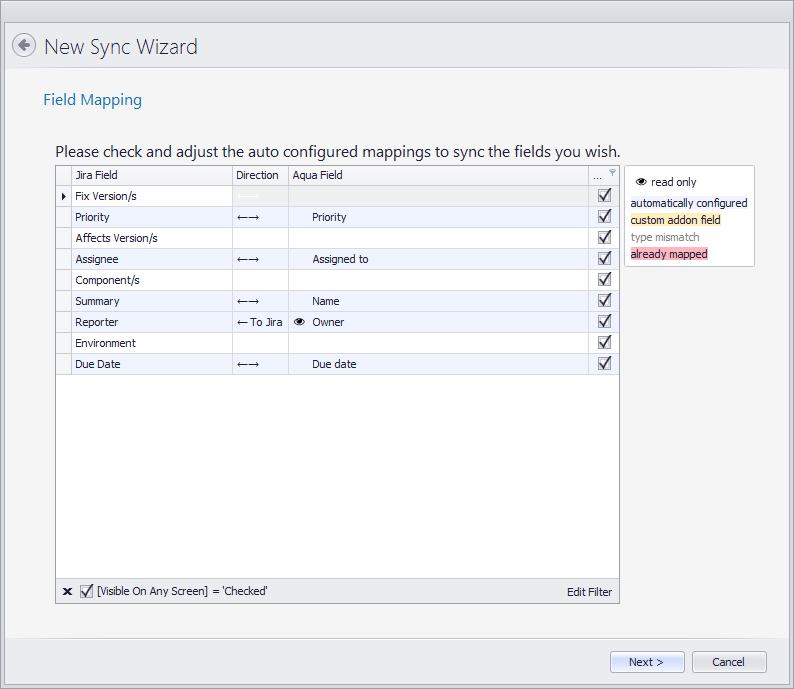
Now we need to map the fields. Some fields are recognized automatically, others are synced automatically, but some need to be mapped manually. This can be done now.
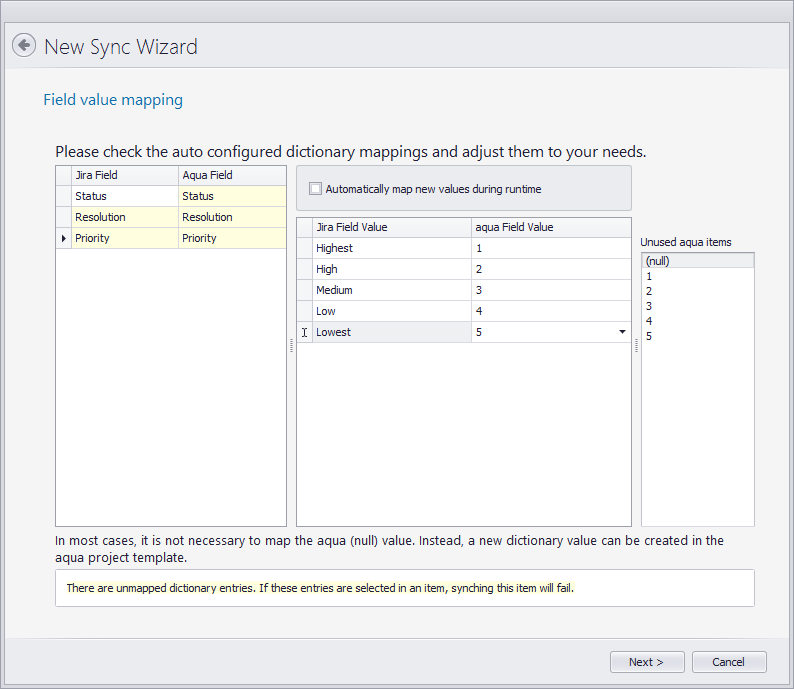
When all fields are mapped according to our needs, we map the field values for drop down fields. All values in Jira should be mapped to a value in aqua. The values do not need to have the same names in order to be mapped.
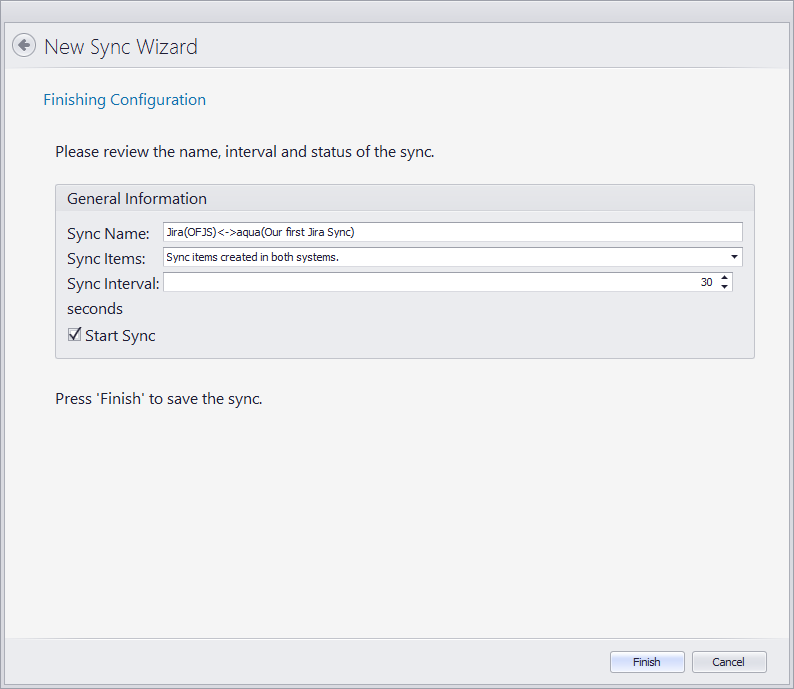
In the last screen we define in which direction the sync should work (Jira to aqua, aqua to Jira or both), and the sync interval.
We successfully created our first, basic Jira sync.