In aqua
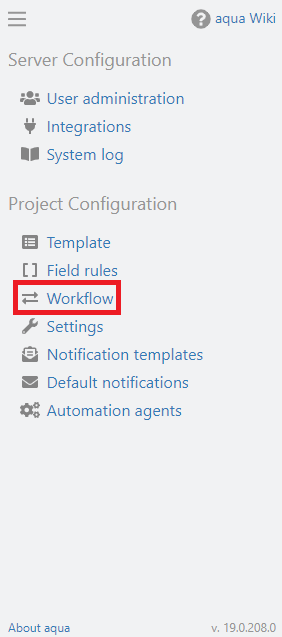
you can define a workflow for each item type. To configure a workflow, select your project in the project browser and click on the configuration menu in the upper left corner of the aqua header  . In the project configuration area select the entry Workflow.
In the now opened workflow designer you can define a workflow for each item type by selecting the item type at the bottom of the navigation bar and then clicking on the Use workflow button in the Workflow panel of the ribbon bar. Please note: in the workflow configuration you can only configure the workflow, i.e. the allowed status transitions as well as restrictions to certain roles or fields. Which status are available and how they are named is defined in the Template configuration (in the field Status of the respective item type).
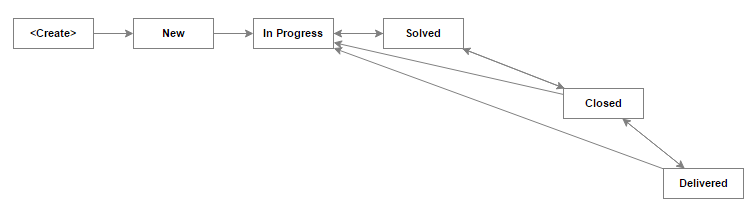
As an example, let's look at a workflow for defects. When we create a new defect, we want it to have the initial status New. This is the transition between the nodes <Create> and New. If, for example, a programmer starts to fix the defect, the only next possible status for the defect is In Progress. In order to configure this dependency you need to create the transition between the nodes New and In Progress. To do this, slide the mouse over the middle of the New node, when the mouse cursor changes to a hand and the box is getting highlighted, press and hold the left mouse button, drag the arrow to the In Progress node and release the mouse button.
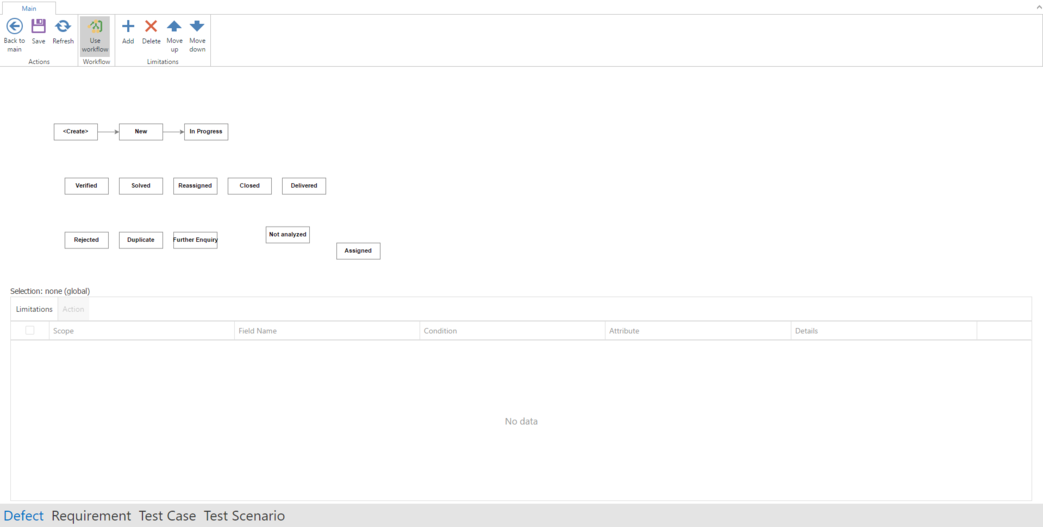
The other transitions between the different statuses can be configured in the same way. If you want a transition to be possible in both directions, simply create another arrow in the opposite direction. If you want to remove a transition, select the corresponding arrow and use the Delete key to delete the arrow. A complete workflow for defects could look like this:
In Summary:
1. Activate a workflow by clicking on the Use Workflow button in the ribbon bar.
2. Initiate the transition between the nodes <Create> and New for the default status value.
3. Create further transitions between the nodes depending on your desired workflow.
In addition to the permitted status transitions, limitations can also be defined. The following limitation types are possible: global limitations defined for the entire workflow, action limitations for transitions between status nodes, and status limitations for a specific status.
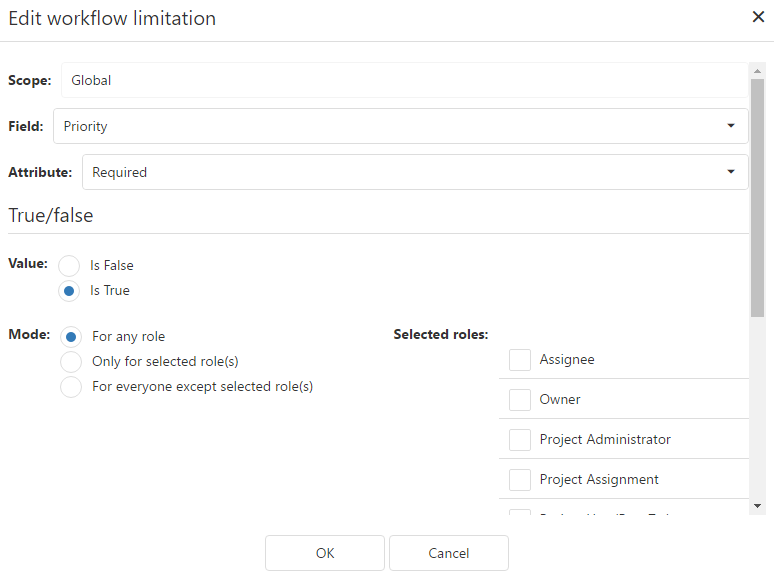
To create a Global Limitation, make sure that no vertices are selected which is the case if there is written Selection: none (global) and click Add. A dialogue will open where you can define your limitation.
For example, we want the Priority field to be mandatory when creating a defect. To do this, click in the field selection list and select Priority from the list of existing fields. To make the Priority field mandatory, click in the Attributes drop-down list and select Required. Select the Is True checkbox. Under Role Condition, we can also define that this limitation only applies to certain roles. In our example, the limitation applies to any roles.
After clicking OK, the new limitation is added in the table of the area Global for the global scope. The table has the following five columns: Scope, Field Name, Condition, Attribute and Details.
|
Scope:
|
Describes the extent of the area for the limitation.
|
|
Field:
|
Specifies the field for which the limitation is applied.
|
|
Condition:
|
Defines a particular user role for which the limitation should apply.
|
|
Attribute:
|
Determines a property for the field for which the limitation should apply.
· Hidden - the field cannot be seen.
· Editable - the field can be edited.
· Default Value - sets a default value for the field.
· Highlight - highlights the field as outstanding and sets its background color to yellow.
· Required - makes the field compulsory and sets its background color to red.
· Value – differs depending on the type of the selected field in column Field.
|
|
Details:
|
Depends on the type of the selected field in the column Field and the selected value in the column Attribute.
|
Note: No limitations are possible for fields of type Text, as this is a type for rich texts.
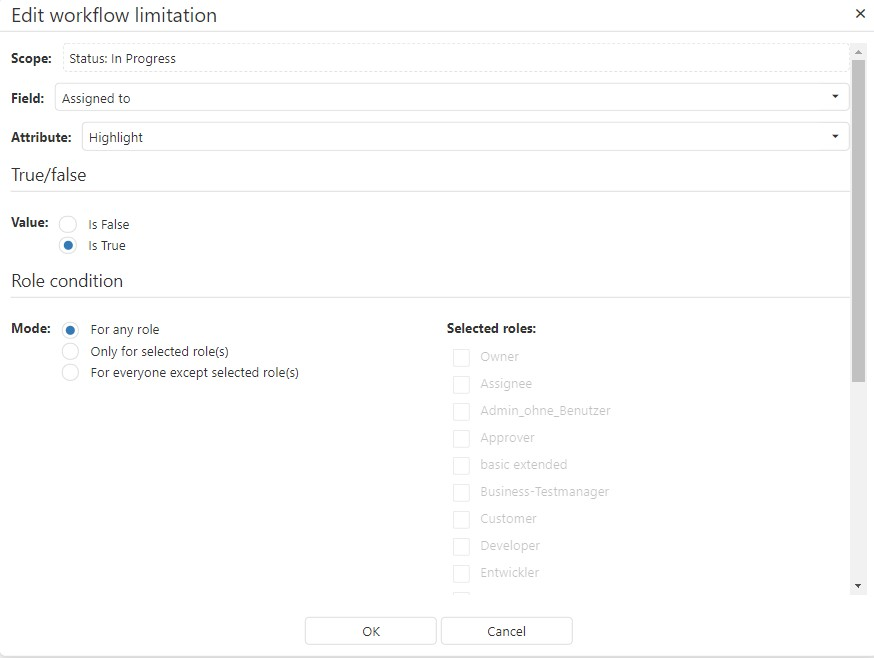
To create a status limitation for a specific status, click on the node of that status. For example, you want the Assigned to field to be highlighted, but only if the defect has the status In Progress. To do this, click the In Edit node and click the Add button in the limitations panel to add a limitation. Click on the Field drop-down list and select the Assigned to field from the list of existing fields. To highlight the Assigned to field, click on the Attributes drop-down list and select Highlight. In this case, we do not want to negate the value of the attribute, so the value Is True should remain true. Mode should be set to For all roles, because we want the limitation to be active for all roles.
In the same way, any limitations can be set for other statuses. In the limitations table in the lower area, all limitations for the selected status are then displayed and can be adjusted using the Modify button. In addition, statuses for which at least one limitations exists are outlined in red.
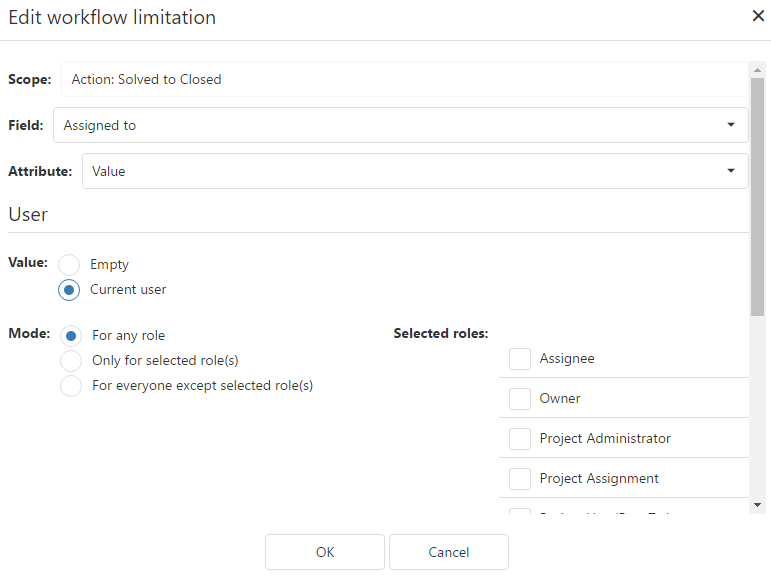
You can also create a limitation for a particular transition. We want for example that the field Assigned to, automatically resets its value to the user, which changes the Status of the defect to Closed. In order to do so, click on the arrow between the nodes Solved and Closed and press the Add button. The new limitation is added in the Limitations table for the transition from Solved to Closed.
Click in the field dropdown and choose Assigned to from the list of the existing fields. To set the value of the field, select Value on the Attribute dropdown. In this case we want to setup the user who will change the value of status, so check Current user.
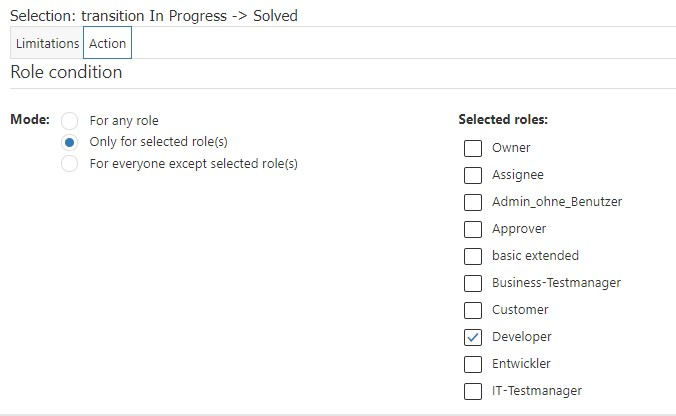
Finally, you can restrict the transitions between the different statuses to specific roles. You do this in the Actions tab in the limitations table. To add an action limitation for a specific connection, click on the transition arrow. For example, we want the status transition from In Progress to Solved to be performed by the Developer role only. To do this, we click on the transition arrow between In Progress and Solved, then select the Actions tab and click 'Only for selected role(s)' and check the Developer role.
In the project configuration, you can use both
workflow and
field rules to set limitations on fields. Furthermore field values from selection fields with shared value sets and text fields can be
set automatically when creating dependent items or creating defects from test executions. Lastly you can also set default values for all item fields via the
project and user defaults. If you use more than one of these, the
following behavior should be considered.