Gates and Stages (Rich Client)
You can use the stage - gate model within aquas Project Planning module. You can add specific stages to your plan and the according gates which need to be passed.
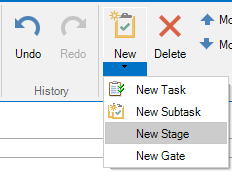
In order to add a stage, you open an existing project plan and press the  button. You can now add a new stage by clicking on the arrow below the
  button and select 'New Stage'
A new stage will be added to your plan. Status is automatically set to 'Planned'. The status of a stage can differ between 'Planned', ' In Progress' or 'Completed'.

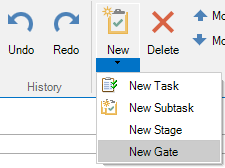
To add a new gate you can proceed as described before, with the difference that you select 'New Gate' after clicking the New button.
A new gate will be added.

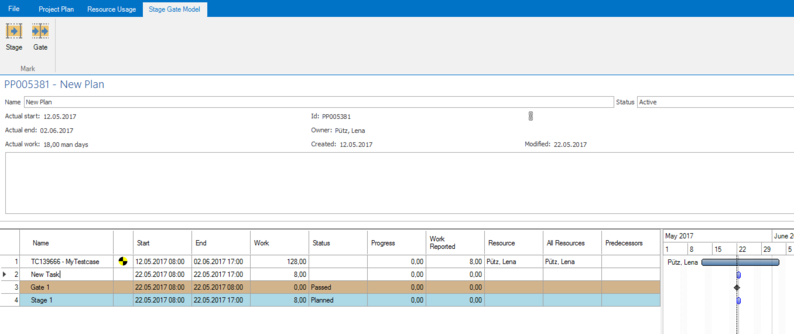
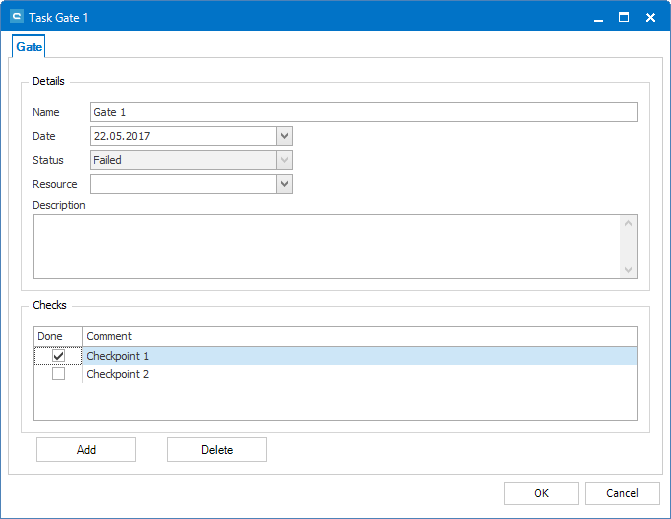
As you can see, stages and gates are highlighted differently in the table view as well as in the Gantt chart. A gate can have different checkpoints that need to be passed in order to pass the gate. To do so, right-click the gate and select edit. A window will open, where you have the possibility to add Checks.
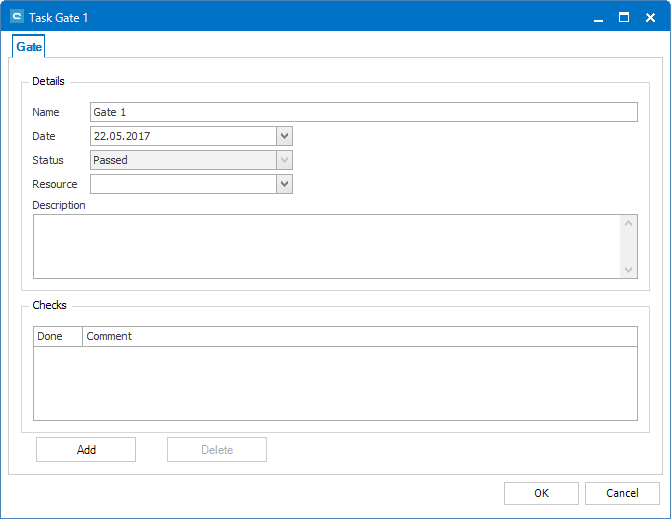
To add a checkpoint, press 'Add'. A new line will appear where you are able to give a name to the checkpoint. The checkbox allows to set it to done later on. The status of the gate will remain Failed until every checkpoint is marked as done.
Using the Stage Gate Model tab, you can also mark existing tasks as gate or stage. The task will then be marked accordingly in table and Gantt chart.