Configuration in Jira
Configure the plugin in Jira
1. Within the Manage Addons Tab is now a section called aqua available
2. Choose Configure
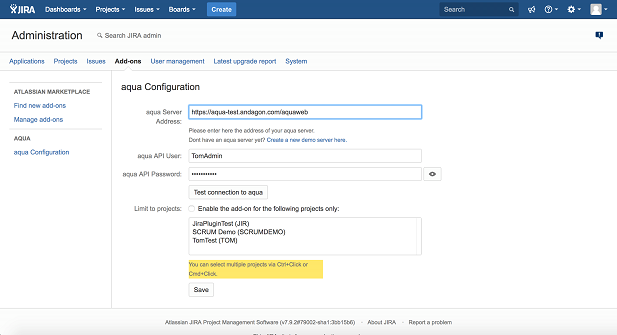
a. Enter valid aqua Server URL and Credentials (for the URL keep to the following format: as OnPremise customer e.g. http(s)://your-aqua-server/aquaWebNG, as SaaS customer https://app.aqua-cloud.io/aquaWebNG and on the demo server https://aqua-demo(2).andagon.com/aquaWeb).
Note: A single aqua user is used to access information about aqua items from the Jira plugin.
The plugin and this user do not change any item (e.g. test case) in aqua. Therefore, this aqua user just needs read only access.
For any changes or test executions to be made in aqua, the Jira end user will be prompted to enter his own individual aqua credentials.
The aqua user needs to be added to any aqua projects the plugin should be able to access.
b. Click “Test connection to aqua” to verify that the entered URL and credentials are correct.
3. To enable aqua for all projects do not enable the project limitation (default). Otherwise you have to select all projects which aqua should be made available for.