Configuration in aqua
This step is optional but recommended. In order to show information about any Jira items in aqua, the connection to Jira needs to be configured.
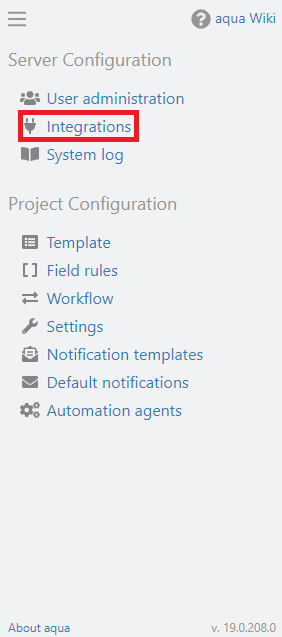
In order to configure the integration, click on the configuration menu in the upper left corner of the aqua header  . In the server configuration area select the entry Integrations.
1. Click on “New integration” and select Jira.
2. Enter the credentials to a Jira user that can access the Jira projects using the aqua4Jira plugin.
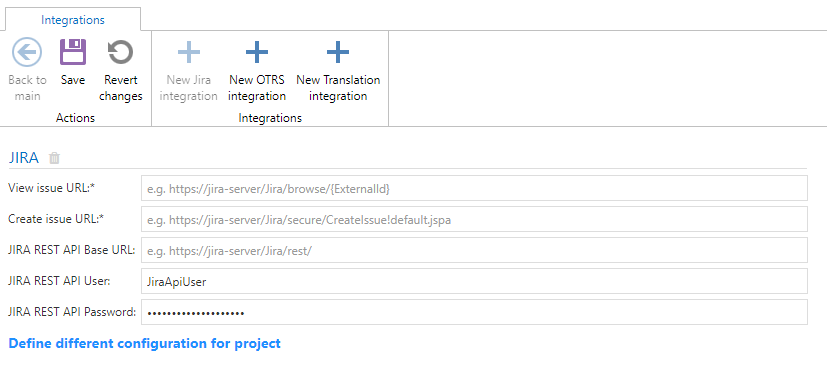
The following settings are available:
|
View issue URL
|
If you configure this URL, you are able to open your connected Jira items inside of aqua items directly using mouse-click. {ExternalId} is a placeholder that is replaced with your JiraId at runtime and should be part of the URL to open the correct Jira item.
|
|
Create issue URL
|
If you configure this URL, you are able to create new Jira items directly, e.g. in scope of a test execution to create a bug in Jira.
|
|
JIRA REST API Base URL
|
Provide a proper Jira-API-URL, Jira User and Password so that aqua can display further information inside of aqua about connected Jira items
|
|
JIRA REST API User
| |
|
JIRA REST API Password
|
For example, the links could then look like this:
https://Jira-Server/browse/{ExternalId}
https://Jira-Server/secure/CreateIssue!default.jspa
https://Jira-Server/rest
Note when using Jira Cloud: a separate API password, also called API token, must be created so that the Jira user can log in via the REST API. This can be configured at the following URL: https://id.atlassian.com/manage-profile/security/api-tokens
Furthermore the email address must be used instead of the username.