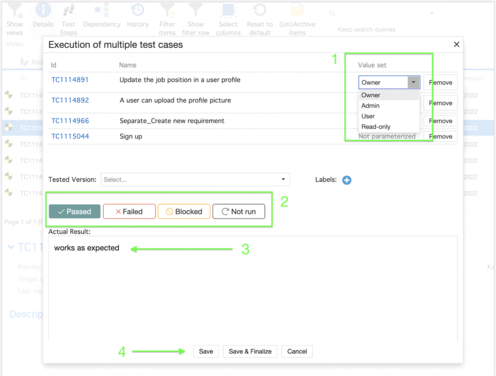
Step 5: When the pop up appears, choose the value set you want to use for each test case execution;
Step 6: Set the tested version.
Spet 7: Create labels (optional).
Step 8: Define the status.
Step 9: Provide the actual result.
Step 10: Save the execution.
When you save the executions, the status and the actual result are applied to all steps in the test case run. The results will be stored in aqua as per general manual test execution.
Please be aware that if you choose ‘Save&Finalise’ for the executions, then you won’t be able to modify them anymore.