Jenkins Integration (Rich Client)
For interactions between aqua and Jenkins, the famous open source tool for continuous integration, andagon has developed a plugin that can be installed on Jenkins and which allows you to trigger Jenkins jobs from aqua and vice versa, that is, to trigger test scenarios in aqua from a Jenkins job. Unit test results can also be written back to aqua as well so that they can benefit from aqua's powerful reporting engine. Furthermore, aqua links can be parsed from a repositories’ comments (e.g. Subversion or Git) and are shown in Jenkins. This chapter describes in details the required steps to set up and configure the integration with Jenkins.
Installation
Note 1: Before starting the installation of the Jenkins plugin, please ensure that you have the proper Jenkins plugin matching your aqua installation version number and your Jenkins installation version number. If you are not sure, please contact our support team.
Note 2: This installation guide is based on Jenkins version 1.596.2 and aqua 16 but should be similar for current version of aqua and Jenkins.
Installing the aqua Jenkins Plugin
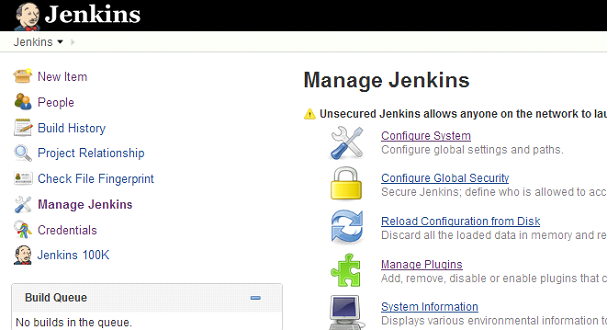
The Jenkins plugin is delivered as a file called “aquaJenkinsPlugin.hpi”. To install this plugin, please open the Jenkins dashboard and choose Manage Jenkins on the left hand side. Then select Manage plugins located in the centre.
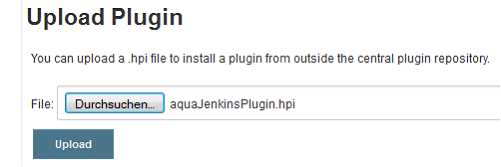
On the website that now appears, please select tab Advanced and upload the plugin manually.
After successful installation you should see an entry below the Installed tab called aquaJenkinsPlugin.
Configuring the Jenkins plugin
To configure aqua’s Jenkins plugin, please open the Jenkins Dashboard and choose “Manage Jenkins” on the left hand side navigation menu. Then choose “Configure System” from the middle.
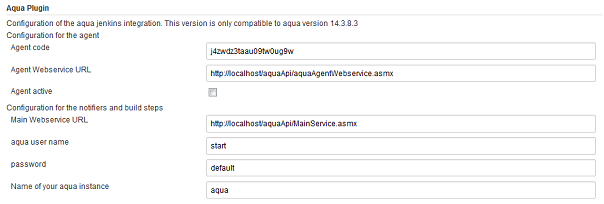
Scroll down to the following section named “Aqua Plugin”:
As you can see in the screenshot, the plugin requires the following information:
|
Agent code
|
An agent code that identifies the plugin in your aqua installation. Retrieve this code by opening aqua. Right-Click the corresponding project and choose “Project Configuration” => “Automation”. On the appearing window add a new agent, call it Jenkins (or similar) and save your settings.
|
|
Agent Webservice URL
|
The Webservice URL for aqua Agents. Retrieve this information from your administrator. You can check this URL by opening the URL in your browser. You should see a website entitled “aquaAgentWebservice”.
|
|
Agent active
|
This activates your Jenkins Plugin.
|
|
Main Webservice URL
|
The common Webservice URL for retrieving test cases. Retrieve this information from your administrator. You can check this URL by opening the URL in your browser. You should see a website entitled “MainService”. This is only used for the direction Jenkins -> aqua
|
|
Aqua user name
|
A valid aqua user name that is used for authentication. This is only used for the direction Jenkins -> aqua
|
|
Password
|
The corresponding password that is used for authentication. This is only used for the direction Jenkins -> aqua
|
|
Name of your aqua instance
|
The name of your aqua instance can be found by opening your aqua Client. The footer shows the appropriate information, in our case “aquatest-oracle”.
|
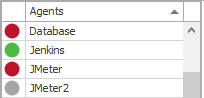
When you have completed your settings, please save them by clicking Save in Jenkins. You can check if your settings have been successful by opening your aqua Client. Right-click the corresponding project and choose Project Configuration => Automation. In the window that appears your newly created agent should have a green dot. Please do not forget to click on the Refresh button in the ribbon bar in the case that the agent window was still open.
Triggering Jenkins Jobs from aqua
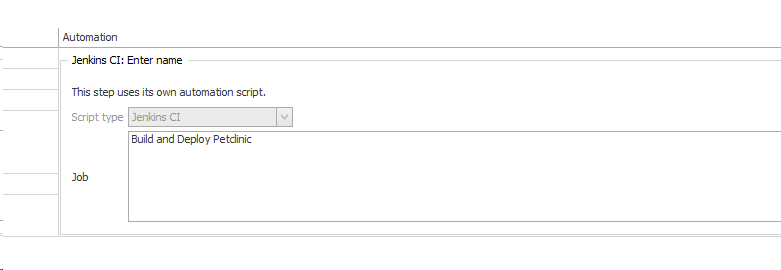
For triggering a job in Jenkins from aqua please create a new test case in aqua. Give your new test case a name and open the Step Designer from the ribbon bar. Now choose tab Automation and add a new Jenkins Script to the corresponding test step. In the input field called Script simply add the name of the job in Jenkins.
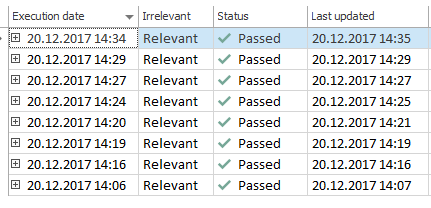
When you are done, save your test case and execute it by choosing your Jenkins agent.
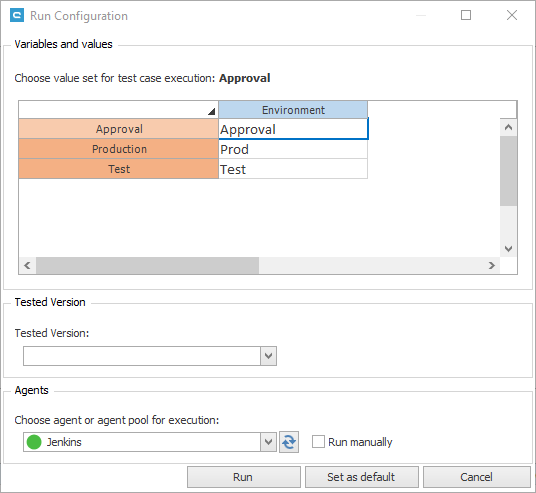
Note: A Jenkins job can be parameterized. If you want to overwrite a specific parameter, e.g. Environment, you can parameterize your aqua test case. When triggering the given Jenkins job via aqua, the given value, e.g. Approval, is set properly in Jenkins.
aqua Testjob Trigger: Triggering Execution of Test Scenario’s from Jenkins
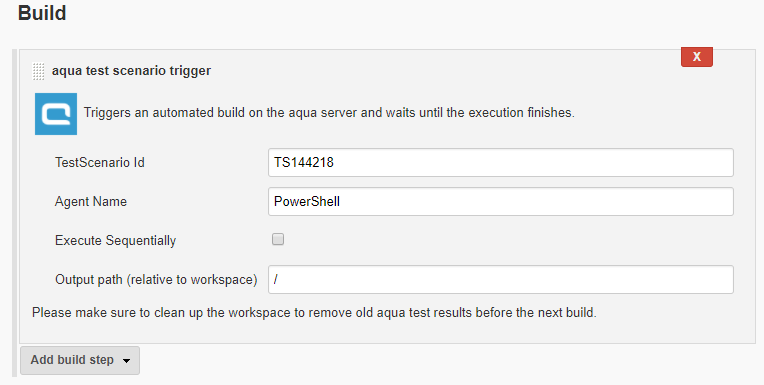
aqua test scenarios can be triggered by Jenkins. This is a suitable way to execute your automated tests in aqua after a successful build in Jenkins. To add this trigger, add a build step called aqua Testjob Trigger. This adds the following form to your Jenkins job.
As you can see in the screenshot, the aqua Testjob Trigger requires the following information:
|
TestScenario Id
|
The aqua Id of the test scenario you want to be executed
|
|
Agent Name
|
The default automation agent the test scenario should use (can be empty, but then ensure that each test case in your test scenario is assigned an appropriate agent for execution, otherwise it will fail)
|
|
Execute Sequentially
|
Execute test cases of your test scenario sequentially
|
|
Output Path
|
A Jenkins output path for your test results, where results are stored in Unit-Test format so that Jenkins can also show test results.
|
aqua Notifier: Writing Unit Test Results from Jenkins to aqua
Unit test results are shown in Jenkins. However, to get access to this information in aqua, you have the option to write back the results into a template test case in aqua.
The first step is to create this test case in aqua. Open a new test case, give it a name, e.g. “Unit test results”, then save and close the test case.
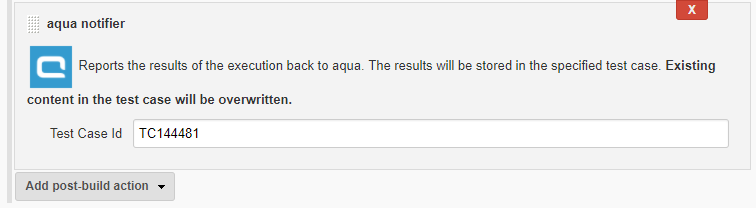
Then go to your Jenkins Job, add a new Postbuild Action called aqua Notifier” and enter the Id of your aqua test case.
When executing this Jenkins job now, your Unit test results are written to your aqua test case and stored as a new execution in this test case. Please be aware that in addition to the creation of a new test execution, the test description and all test steps are replaced with the information from Jenkins, every time the Jenkins job is executed. Therefore any information stored in the test case description or test steps will be replaced. Do not save the Unit test results into the same test case that triggers a Jenkins job!
You can also use a variable for the Test Case Id (e.g. $TestCaseVariable) if you have a parameterized Jenkins job and want to store the results in different test cases in aqua. For this purpose, all test cases from the variable values must exist in aqua.
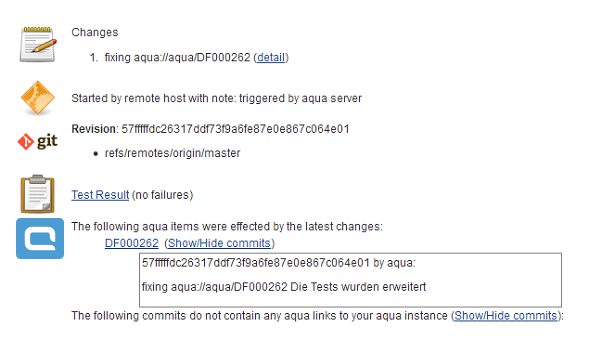
aqua Links: Showing aqua Links in Jenkins
The Jenkins plugin can analyze commit messages from Subversion or Git. If the comment contains a link to an item in aqua, they are parsed and shown in Jenkins.
To configure aqua Links, go to your Jenkins Job and add a new Postbuild Action called aqua Links.
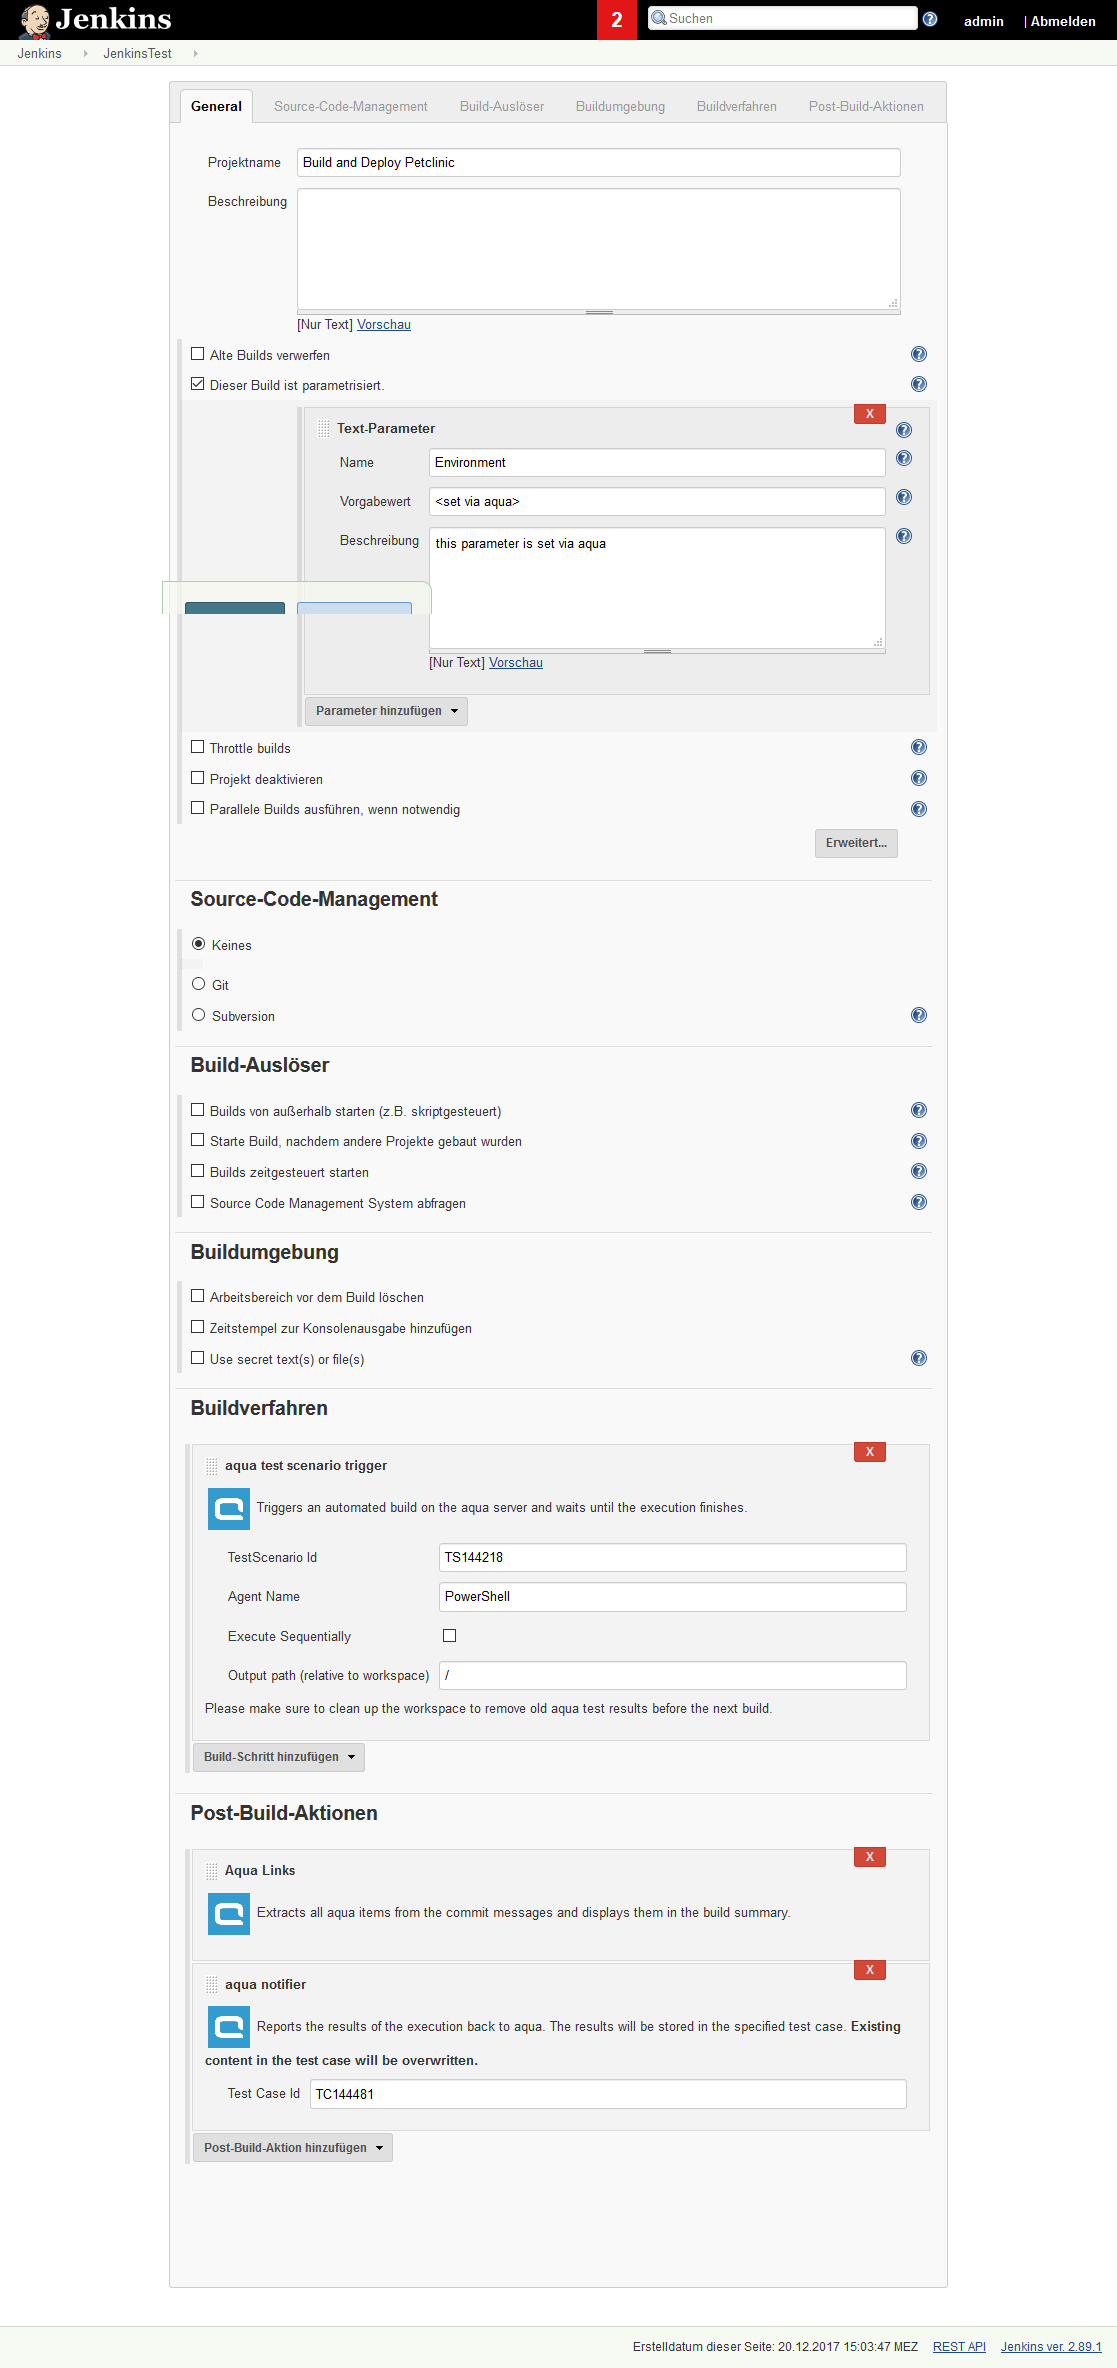
A Sample Jenkins Job Containing all aqua Elements
The following screenshot contains a sample Jenkins job with configuration of aqua Testjob Trigger, aqua Notifier and aqua Links